


road and workshop
Page 39
If you've noticed an error in this article please click here to report it so we can fix it.
by Handyman
Benchwise: lathe sense (33)
ALL the normal rules and procedures apply when dealing with square form or acme threads, with the exception of feeding by top slide which I described when dealing with V-form threads. This latter system, with its benefits of speed, etc, cannot be used because the tool must now approach the work'at a true right angle. Also, as the tool itself will need to be shaped to give the required thread-form no tilting must occur that will displace the side angles of the tool, otherwise the accepting nut or thread will not operate correctly.
While on the face of it I am now dealing with almost a straight turning job, certain points need close attention when cutting a square or acme thread—in particular the angle of the tool in relation to the thread helix angle. The main danger here is that if the tool angle fails to conform with the helix, the tool skirt can bind on the wall of the thread: this will have the effect of moving the tool out of line and can cause a wider groove than required.
Solid tool holder Skilled turners usually prefer a solid tool holder of square or hexagon bar, with a hole bored centrally in one end with an Allen lock screw coming in at a right angle; the tool bit itself will be round shanked and the thread form shaped as required, but now the tool bit can be slightly turned or adjusted in the holder to eliminate the risk of the binding, as I indicated. Obviously this problem will be more in evidence on the smaller screws where the helix angle is more acute in relation to the thread axis.
I should mention that it usually takes a little practice to get this thread form exactly right but with the aid of the adjustable tool bit the difficulty is very much reduced. However, I strongly recommend that the trainee or part-time man dealing with his first square thread should have one or two trial runs on scrap round bar until he• can safely set up for the form and clearance needed. As the square thread has a groove of the same width, it is essential when preparing the tool that it is finished at exactly half the pitch of the thread, viz, if the pitch of a square thread is fin., then the tool width must be iin.
In garage work it is hardly likely that the turner will fail to meet the left-hand thread, and whereas in the main this will be road wheel studs and nuts, sooner or later he will be asked to make up a number from suitable steel rod when that particular size, or rather shape, is temporarily unobtainable. In this instance, the V-form left-hand is no problem, but, of course, the tumbler gear has to be reversed. Only one additional point of importance must be watched. This is to remember that the helix is now sloping in the opposite direction, and the clearance angle of the tool must be adjusted to suit.
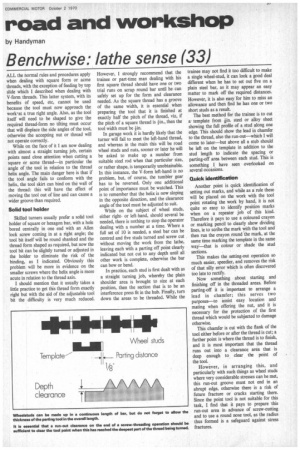
While on the subject of wheel studs, either rightor left-hand, should several be needed, there is nothing to stop the operator dealing with a number at a time. Where a full set of 10 is needed, a steel bar can be centred and five studs turned and screw cut without moving the work from the lathe, leaving each with a parting off point clearly indicated but not cut to any depth until all other work is complete, otherwise the bar can bow or bend.
In practice, each stud is first dealt with as a straight turning job, whereby the plain shoulder area is brought to size at each position, then the section that is to be an interference press fit in the hub. Finally, turn down the areas to be threaded. While the trainee may not find it too difficult to make a single wheel-stud, it can look a good deal different when he has to set out five on a plain steel bar, as it may appear an easy matter to mark off the required distances. However, it is also easy for him to miss an allowance and then find he has one or two short studs as a result.
The best method for the trainee is to cut atemplate from kin, steel or alloy sheet showing the full profile of a stud along one edge. This should show the lead in chamfer to the thread, also the run-out—which I will come to later—but above all a stub should be left on the template in addition to the stud length to indicate the spacing or parting-off area between each stud. This is something I have seen overlooked on several occasions.
Quick identification Another point is quick identification of setting out marks, and while as a rule these will be placed on the work with the tool point rotating the work by hand, it is not quite so easy to identify position marks when on a repeater job of this kind. Therefore it pays to use a coloured crayon or marking pencil to clearly show dividing lines, ie to scribe the mark with the tool and then run the crayon round the mark, at the same time marking the template in the same way.—that is colour or shade the stud sections.
This makes the setting-out operation so much easier, speedier, and removes the risk of that silly error which is often discovered too late to rectify.
Now something about starting and finishing off in the threaded areas. Before parting-off it is important to arrange a lead in chamfer; this serves two purposes—to assist easy location and mating when offering the nut, and it is necessary for the protection of the first thread which would be subjected to damage otherwise.
This chamfer is cut with the flank of the tool either before or after the thread is cut; a further point is where the thread is to finish, and it is most important that the thread runs out into a clearance area that is deep enough to clear the point of the tool However, in arranging this, and particularly with such things as wheel studs where very considerable stresses can be met, this run-out groove must not end in an abrupt edge, otherwise there is a risk of future fracture or cracks starting there. Since the point tool is not suitable for this task, I find that it pays to prepare this run-out area in advance of screw-cutting and to use a round nose tool, as the radius thus formed is a safeguard against stress fractures.