Ensuring Accuracy in Manufacture.
Page 50

If you've noticed an error in this article please click here to report it so we can fix it.
"rt 'MING a recent visit to the ex tensive works of Leyland Motors, Ltd., we were very interested to note the large number of new machines in the shops and the great
• efforts which are being made not only to maintain accuracy in manufacture but, if possible, to improve it. It is considered of the greatest importance that every power unit should receive not only an extremely thorough test but that really accurate records should be kept of output and any units not fully up to standard rejected for further treatment.
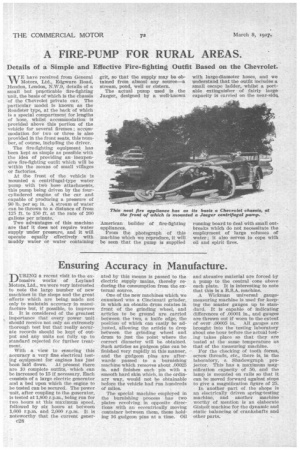
With a view to ensuring this accuracy a very fine electrical testing equipment for engines has just been laid down. At present there are 10 complete outfits, which can be increased to 15 if necessary. Each consists of a large electric generator and a bed upon which the engine to be tested can be secured. The power unit, after coupling to the generator, is tested at 1,800 r.p.m., being run for two hours at this maximum speed, followed by six hours at between 1,000 r.p.m. and 2,000 r.p.m. It is noteworthy that the current goner o28 ated by this means is passed to the electric supply mains, thereby reducing the consumption from the external source.
One of the new machines which we examined was a Cincinnati grinder, in which an ebonite drum rotates in front of the grinding wheel, and articles to be ground are carried between the two, a knife edge, the position of which can easily be adjusted, allowing the article to drop between the grinding wheel and drum to just the point where the correct diameter will be obtained. Such articles as 'gudgeon pins can be finished very rapidly in this manner, and the gudgeon pins are afterwards passed to a burnishing machine which removes about .00025 in. and finishes each pin with a smooth hard skin which, in the ordinary way, would not be obtainable before the vehicle had inn hundreds of miles.
The special machine employed in the burnishing process has two plates revolving in opposite directions with an eccentrically moving container between them, these holding 16 gudgeon pins at a time. Oil and abrasive material are forced by a pump to the central cone above each plate. It is interesting to note that this is a R.S.A. machine.
A Wickman universal gaugemeasuring machine is used for keeping the master gauges up to standard. It is capable of indicating differences of .00001 in., and gauges are thrown out if worn to the extent of over .00005 in. All gauges are brought into the testing laboratory about one hour before the actual testing takes place so that they are tested at the same temperature as that of the measuring machine.
For the checking of tooth forms, screw threads, etc., there is, in the laboratory, a Shadowgraph projector. This has a maximum magnification capacity of 50, and the lamp is mounted on rails so that it can be moved forward against stops to give a magnification figure of 25.
In another part of the shops is an electrically driven spring-testing machine, and another machine worthy of mention is an elaborate Gisholt machine for the dynamic and static balancing of crankshafts and other parts.


