• Fitters have become used to the Daf forward-control cab
Page 157

Page 158

Page 159

Page 160

If you've noticed an error in this article please click here to report it so we can fix it.
— it has been around since 1969. However, with Leyland and Daf joining forces and the arrival of the 95-Series cab in 1987, those fitters who were very much at home with the old vehicle have had to start the learning process all over again.
All 95-Series trucks are powered by Dafs 11.6-litre engines in turbocharged and intercooled form, providing a range of power outputs. ZF gearboxes are the standard fitment to trucks in the range and Daf axles are retained.
From a fitter's point of view, the new cab's tilt angle is slightly less than that of its predecessor, while the engine itself is enclosed by two noise insulation panels, and one is lifted clear when the cab tilts.
The vehicle Workshop watched being serviced is down-plated to 32 tonnes and used by Sony UK to distribute consumer electronics goods to its national account customers. During its 20 months in service the vehicle has clocked up 167,000km (104,000 miles). Two regular drivers use the vehicle. It is fitted with a cab phone and is kept immaculately clean inside and out. All Sony's vehicles are maintained to the highest standard and inspected by the Freight Transport Association every three months.
Theale Commercials, which before the Leyland Daf merger was a Daf service agent, was to carry out an A-service on our truck. The garage is now part of Hays Distribution Services, maintaining the company's Theale-based fleet as well as taking third-party work. Our fitter was Ian Garden, who received his training in the Armed Services before joining Theale Commercials and has since attended a course on 95-Series vehicles.
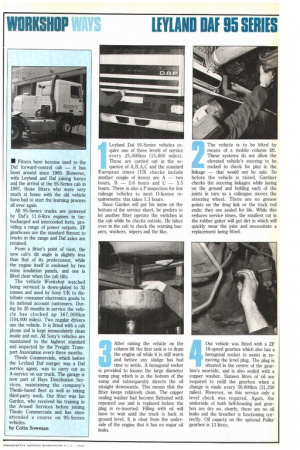
by Colin Sowman Leyland Daf 95-Series vehicles re quire one of three levels of service every 25,000km (15,600 miles).
These are carried out in the se quence of A,B,A,C and the standard European times (UK checks include another couple of items) are A — two hours, B — 2.6 hours and C — 5.5 hours. There is also a P-inspection for low mileage vehicles to meet 0-licence requirements: this takes 1.3 hours.
Since Garden will put his name on the bottom of the service sheet, he prefers to let another fitter operate the switches in the cab while he checks outside. He takes over in the cab to check the warning buzzers, washers, wipers and the like. The vehicle is to be lifted by means of a mobile column lift. These systems do not allow the elevated vehicle's steering to be rocked to check for play in the linkage — that would not be safe. So before the vehicle is raised, Gardner checks the steering linkages while laying on the ground and holding each of the joints in turn as a colleague moves the steering wheel. There are no grease points on the drag link or the track rod ends; they are sealed for life. While this reduces service times, the smallest cut in the rubber gaiter will get dirt in which will quickly wear the joint and necessitate a replacement being fitted.
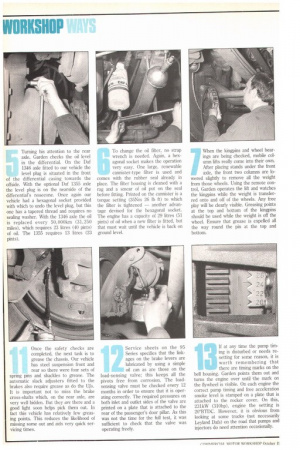
After raising the vehicle on the column lift the first task is to drain the engine oil while it is still warm and before any sludge has had time to settle. A hexagonal socket is provided to loosen the large diameter sump plug which is in the bottom of the sump and subsequently directs the oil straight downwards. This means that the fitter keeps relatively clean. The copper sealing washer had become flattened with repeated use and is replaced before the plug is re-inserted. Filling with oil will have to wait until the truck is back at ground level. It is clear from the underside of the engine that it has no major oil leaks. Our vehicle was fitted with a ZF 16-speed gearbox which also has a hexagonal socket to assist in removing the level plug. The plug is situated in the centre of the gearbox's nearside, and is also sealed with a copper washer. Sixteen litres of oil are required to refill the gearbox when a change is made every 50,000km (31,250 miles). However, on this service only a level check was required. Again, the underside of both bell-housing and gearbox are dry so, clearly, there are no oil leaks and the breather is functioning correctly. Oil capacty on the optional Fuller gearbox is 13 litres. Turning his attention to the rear axle, Garden checks the oil level in the differential. On the Daf 1346 axle fitted to our vehicle the level plug is situated in the front of the differential casing towards the offside. With the optional Daf 1355 axle the level plug is on the nearside of the differential's nosecone. Once again our vehicle had a hexagonal socket provided with which to undo the level plug, but this one has a tapered thread and requires no sealing washer. With the 1346 axle the oil is replaced every 50,000km (31,250 miles), which requires 23 litres (40 pints) of oil. The 1355 requires 13 litres (23 pints). To change the oil filter, no strap wrench is needed. Again, a hexagonal socket makes the operation very easy. One large, renewable cannister-type filter is used and comes with the rubber seal already in place. The filter housing is cleaned with a rag and a smear of oil put on the seal before fitting. Printed on the cannister is a torque setting (35Nm 26 lb ft) to which the filter is tightened — another advantage devised for the hexagonal socket. The engine has a capacity of 29 litres (51 pints) of oil when a new filter is fitted, but that must wait until the vehicle is back on ground level.
7 ' When the kingpins and wheel bearings are being checked, mobile column lifts really come into their own. After placing stands under the front ' axle, the front two columns are lowered slightly to remove all the weight from those wheels. Using the remote control, Garden operates the lift and watches the kingpins while the weight is transferred onto and off of the wheels. Any free play will be clearly visible. Greasing points at the top and bottom of the kingpins should be used while the weight is off the wheel. Ensure that grease is expelled all the way round the pin at the top and bottom.
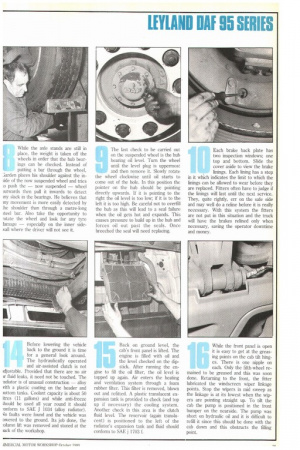
While the axle stands are still in place, the weight is taken off the wheels in order that the hub bearings can be checked. Instead of putting a bar through the wheel, 1;arden places his shoulder against the iniide of the now suspended wheel and tries .o push the — now suspended — wheel mtwards then pull it inwards to detect my slack in the bearings. He believes that my movement is more easily detected by he shoulder than through a metre-long ;teel bar. Also take the opportunity to rotate the wheel and look for any tyre lamage — especially on the inner side/gall where the driver will not see it. The last check to be carried out on the suspended wheel is the hub bearing oil level. Turn the wheel until the level plug is uppermost and then remove it. Slowly rotate the wheel clockwise until oil starts to come out of the hole. In this position the pointer on the hub should be pointing directly upwards. ff it is pointing to the right the oil level is too low; if it is to the left it is too high. Be careful not to overfill the hub as this will lead to a seal failure when the oil gets hot and expands. This causes pressure to build up in the hub and forces oil out past the seals. Once breeched the seal will need replacing. Each brake back plate has two inspection windows; one top and bottom. Slide the cover aside to view the brake linings. Each lining has a step in it which indicates the limit to which the linings can be allowed to wear before they are replaced. Fitters often have to judge if the linings will last until the next service. They, quite rightly, err on the safe side and may well do a reline before it is really necessary. With this system the fitters are not put in this situation and the truck will have the brakes relined only when necessary, saving the operator downtime and money.
Once the salety checks are completed, the next task is to grease the chassis. Our vehicle has steel suspension front and rear so there were four sets of spring pins and shackles to grease. The automatic slack adjusters fitted to the brakes also require grease as do the U.ls. It is important not to miss the brake cross-shafts which, on the rear axle, are very well hidden. But they are there and a good light soon helps pick them out. In fact this vehicle has relatively few greasing points. This reduces the likelihood of missing some out and aids very quick servicing times. Service sheets on the 95 Series specifies that the linkages on the brake levers are lubricated by using a simple oil can as are those on the load-sensing valve; this keeps all the pivots free from corrosion. The loadsensing valve must be checked every 12 months in order to ensure that it is operating correctly. The required pressures on both inlet and outlet sides of the valve are printed on a plate that is attached to the rear of the passenger's door pillar. As this was not the time for the full test, it was sufficient to check that the valve was operating freely. It at any time the pump timing is disturbed or needs resetting for some reason, it is worth remembering that there are timing marks on the bell housing. Garden points them out and turns the engine over until 'the mark on the flywheel is visible. On each engine the correct pump timing and free acceleration smoke level is stamped on a plate that is attached to the rocker cover. On this, 231kW (310hp), engine the setting is 20°BTDC. However, it is obvious from looking at some trucks (not necessarily Leyland Dafs) on the road that pumps and injectors do need attention occasionally.
Before lowering the vehicle back to the ground it is time for a general look around. The hydraulically operated and air-assisted clutch is not idjustable. Provided that there are no air ir fluid leaks, it need not be touched. The -adiator is of unusual construction — alloy with a plastic coating on the header and iottom tanks. Coolant capacity is about 50 itres (11 gallons) and while anti-freeze Mould be used all year round it should !onform to SAE J 1034 (alloy radiator). +lo faults were found and the vehicle was owered to the ground. Its job done, the :olumn lift was removed and stored at the iack of the workshop.
Back on ground level, the cab's front panel is lifted. The engine is filled with oil and the level checked on the dipstick. After running the engine to fill the oil filter, the oil level is topped up again. Air enters the heating and ventilation system through a foam rubber filter. This filter is removed, blown out and refitted. A plastic translucent expansion tank is provided to check (and top up if necessary) the cooling system. Another check in this area is the clutch fluid level. The reservoir (again translucent) is positioned to the left of the radiator's expansion tank and fluid should conform to SAE j 1703 f. While the front panel is open it is easy to get at the greasing points on the cab tilt hinges. There is one nipple on
!, each. Only the fifth-wheel remained to be greased and this was soon done. Returning to the front, the fitter lubricated the windscreen wiper linkage points. Stop the wipers in mid sweep as the linkage is at its lowest when the wipers are pointing straight up. To tilt the cab the pump is positioned in the front bumper on the nearside. The pump was short on hydraulic oil and it is difficult to refill it since this should be done with the cab down and this obstructs the filling point.
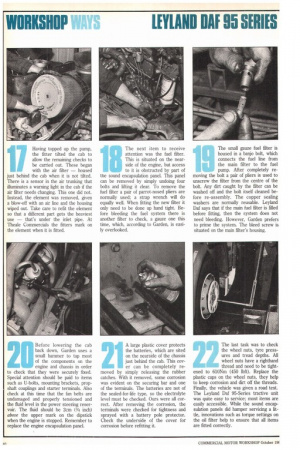
Having topped up the pump, the fitter tilted the cab to allow the remaining checks to be carried out. These began with the air filter — housed just behind the cab when it is not tilted. There is a sensor in the air trunIcing that illuminates a warning light in the cab if the air filter needs changing. This one did not. Instead, the element was removed, Oven a blow-off with an air line and the housing wiped out. Take care to refit the element so that a different part gets the heaviest use — that's under the inlet pipe. At "Reale Commercials the fitters mark on the element when it is fitted. The next item to receive attention was the fuel filter. This is situated on the nearside of the engine, but access to it is obstructed by part of the sound encapsulation panel. This panel can be removed by simply undoing four bolts and lifting it clear. To remove the fuel filter a pair of parrot-nosed pliers are normally used; a strap wrench will do equally well. When fitting the new filter it only need to be done up hand tight. Before bleeding the fuel system there is another filter to check, a gauze one this time, which, according to Garden, is easily overlooked. The small gauze fuel filter is housed in a banjo bolt, which connects the fuel line from the main filter to the fuel pump. After completely re moving the bolt a pair of pliers is used to unscrew the filter from the centre of the bolt. Any dirt caught by the filter can be washed off and the bolt itself cleaned before re-assembly. The copper sealing washers are normally reusable. Leyland Daf says that if the main fuel filter is filled before fitting, then the system does not need bleeding. However, Garden prefers to prime the system. The bleed screw is situated on the main filter's housing.
Before lowering the cab back down, Garden uses a small hammer to tap most of the components on the engine and chassis in order to check that they were securely fixed. Special attention should be paid to items such as U-bolts, mounting brackets, propshaft couplings and starter terminals. Also check at this time that the fan belts are undamaged and properly tensioned and the fluid level in the power steering reservoir. The fluid should be 2cm (3/4 inch) above the upper mark on the dipstick when the engine is stopped. Remember to replace the engine encapsulation panel.
A large plastic cover protects the batteries, which are sited on the nearside of the chassis just behind the cab. This cover can be completely removed by simply releasing the rubber catches. With it removed, some corrosion was evident on the securing bar and one of the terminals. The batteries are not of the sealed-for-life type, so the electrolyte level must be checked. Ours were all correct. After removing the corrosion, the terminals were checked for tightness and sprayed with a battery pole protector. Check the underside of the cover for corrosion before refitting it. The last task was to check the wheel nuts, tyre pressures and tread depths. All wheel nuts have a righthand thread and need to be tightened to 610Nm (450 lbft). Replace the plastic caps on the wheel nuts, they help to keep corrosion and dirt off the threads. Finally, the vehicle was given a road test. The Leyland Daf 95-Series tractive unit was quite easy to service; most items are easily accessible. While the sound encapsulation panels did hamper servicing a little, innovations such as torque settings on the oil filter help to ensure that all items are fitted correctly.


