 1
1 2
2 3
3 4
4 5
5 6
6 7
7 8
8 9
9 10
10 11
11 12
12 13
13 14
14 15
15 16
16 17
17 18
18 19
19 20
20 21
21 22
22 23
23 24
24 25
25 26
26 27
27 28
28 29
29 30
30 31
31 32
32 33
33 34
34 35
35 36
36 37
37 38
38 39
39 40
40 41
41 42
42 43
43 44
44 45
45 46
46 47
47 48
48 49
49 50
50 51
51 52
52 53
53 54
54 55
55 56
56 57
57 58
58 59
59 60
60 61
61 62
62 63
63 64
64 65
65 66
66 67
67 68
68 69
69 70
70 71
71 72
72 73
73 74
74 75
75 76
76 77
77 78
78 79
79 80
80 81
81 82
82 83
83 84
84 85
85 86
86 87
87 88
88 89
89 90
90 91
91 92
92 93
93 94
94 95
95 96
96 97
97 98
98 99
99 100
100 101
101 102
102 103
103 104
104 105
105 106
106 107
107 108
108 109
109 110
110 111
111 112
112 113
113 114
114 115
115 116
116 117
117 118
118 119
119 120
120 121
121 122
122 123
123 124
124 125
125 126
126 127
127 128
128 129
129 130
130 131
131 132
132 133
133 134
134 135
135 136
136 137
137 138
138 139
139 140
140 141
141 142
142 143
143 144
144 145
145 146
146 147
147 148
148 149
149 150
150 151
151 152
152 153
153 154
154 155
155 156
156 157
157 158
158 159
159 160
160 161
161 162
162 163
163 164
164 165
165 166
166 167
167 168
168 169
169 170
170 171
171 172
172 173
173 174
174 175
175 176
176 177
177 178
178 179
179 180
180 181
181 182
182 183
183 184
184 185
185 186
186 187
187 188
188 road and workshop
Page 57
If you've noticed an error in this article please click here to report it so we can fix it.
by Handyman
Benchwise: lathe sense (16)
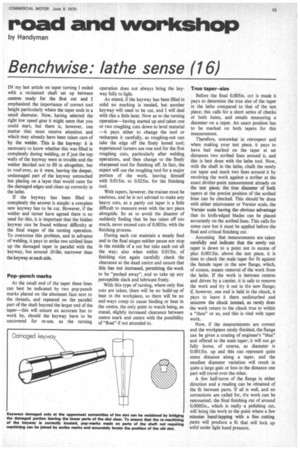
IN my last article on taper turning I ended with a reclaimed shaft set up between centres ready for the first cut and I emphasized the importance of correct tool height particularly where the taper ends in a small diameter. Now, having selected the right low speed gear it might seem that you could start, but there is, however, one matter that must receive attention and which may already have been taken care of by the welder. This is the keyway: it is necessary to know whether this was filled in completely during welding, or if just the top walls of the keyway were in trouble and the welder decided not to fill in altogether, but to roof-over, as it were, leaving the deeper. undamaged part of the keyway untouched but placing on a layer that would cater for the damaged edges and clean up correctly in the lathe.
If the keyway has been filled in completely the answer is simple: a complete new keyway has to be cut. However, if the welder and turner have agreed there is no need for this, it is important that the hidden keyway can be found without difficulty at the final stages of the turning operation. To overcome this problem, and in advance of welding, it pays to strike two scribed lines up the damaged taper in parallel with the keyway, but around .010in. narrower than the keyway at each side.
Pop-punch marks
At the small end cf the taper these lines can best be indicated by two pop-punch marks placed on the abutment face next to the threads, and repeated on the parallel part of the shaft beyond the larger end of the taper—this will ensure an accurate line to work by, should the keyway have to be uncovered for re-use, as the turning operation does not always bring the keyway fully to light.
As stated, if the keyway has been filled in solid no marking is needed, but another keyway will need to be cut, and I will deal with this a little later. Now as to the turning operation—having started up and taken one or two roughing cuts down to level material —it pays either to change the tool or resharpen it carefully. as roughing-out can take the edge off the finely honed tool; experienced turners use one tool for the first roughing cuts, particularly after welding operations, and then change to the finely sharpened tool for finishing off. In fact, the expert will use the roughing tool for a major portion of the work, leaving himself with 0.015in. to 0.025in. for the finishing tool.
With tapers, however, the trainee must be cautious, and he is net advised to make any heavy cuts, as a partly cut taper is a little difficult to measure even with the test piece alongside. So as to avoid the disaster of suddenly finding that he has taken off too much, never exceed cuts of 0.005in. with the finishing process.
During each cut maintain a steady feed and in the final stages neither pause nor stop in the middle of a cut but take each cut all the way; also when within 0.015in. of finishing size again carefully check the clearance at the dead centre and ensure that this has not increased, permitting the work to be "pushed away", and so take up any perceptible slack and lubricate freely.
With this type of turning, where only fine cuts are taken, there will be no build-up of heat in the workpiece, so there will be no end-ways creep to cause binding or heat in the centre, the only point to watch being, as stated, slightly increased clearance between centre mark and centre with the possibility of "floatif not attended to.
True taper-size Before the final 0.005in. ct.t is made it pays to determine the true size of the taper in the lathe compared to that of the test piece; this calls for a short series of checks of both items, and entails measuring a diameter on a taper. An exact position has to be marked on both tapers for this measurement.
Therefore, somewhat in retrospect and when making your test piece, it pays to have had marked on the taper at set distances two scribed lines around it, and this is best done with the lathe tool. Now, with the shaft in the lathe, chalk the newly cut taper and mark two lines around it by revolving the work against a scriber at the exact divider-point measurement already on the test piece; the true diameter of both tapers at the precise position of the scribed lines can be checked. This should 'be done with either micrometer or Vernier scale, the Vernier scale having the obvious advantage that its knife-edged blades can be placed accurately on the scribed lines. This calls for some care but it must be applied before the final and critical finishing cut.
Assuming that measurements are taken carefully and indicate that the newly cut taper is down to a point not in excess of plus 0.0015in. above the test piece, it is time to check the male taper for fit against the female taper in the new flange. which, of course, means removal of the work from the lathe. If the work is between centres and driven by a carrier, it is safe to remove the work and try it out in the new flange; if, however, one end is held in the chuck, it pays to leave it there undisturbed and unscrew the chuck instead, as rarely does the work return to the chuck true to within a "thouor so, and this is vital with taper work.
Now, if the measurements are correct and the workpiece nicely finished, the flange can be given a coating of engineer's "blue" and offered to the male taper; it will not go fully home, of course, as diameter is 0.0015in. up and this can represent quite some distance along a taper, and the smallest diameter variation will result in quite a large gain or loss in the distance one part will travel over the other.
A few half-turns of the flange in either direction and a reading can be obtained of the fit between parts. If all is well, and no corrections are called for, the work can be remounted: the final finishing cut of around 0.0005in., which is really a polishing cut, will bring the work to the point where a few minutes hand-lapping with a fine cutting paste will produce a fit that will lock up solid under light hand pressure.