


Top of the list for the annual ser vice operations
Page 110
Page 111
Page 112
If you've noticed an error in this article please click here to report it so we can fix it.
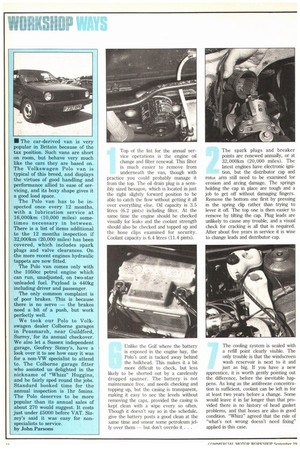
is the engine oil change and filter renewal. This filter is much easier to remove from underneath the van, though with practice you could probably manage it from the top. The oil drain plug is a sensibly sized hexagon, which is located in just the right slightly forward position to be able to catch the flow without getting it all over everything else. Oil capacity is 3.5 litres (6.2 pints) including filter. At the same time the engine should be checked visually for leaks and the coolant strength should also be checked and topped up and the hose clips examined for security. Coolant capacity is 6.4 litres (11.4 pints). The spark plugs and breaker points are renewed annually, or at 32,0001cm (20,000 miles). The latest engines have electronic ignition, but the distributor cap and rona arm still need to be examined for erosion and arcing damage. The springs holding the cap in place are tough and a job to get off without damaging fingers. Remove the bottom one first by pressing in the spring clip rather than trying to lever it off. The top one is then easier to remove by tilting the cap. Plug leads are unlikely to cause any trouble, and a visual check for cracking is all that is required. After about five years in service it is wise to change leads and distributor cap. Before you can remove the spark plugs it is necessary to take off the air cleaner. Although this is a nuisance, you are going to change the cleaner element anyway. The real problem is in the conversion to right hand drive, where the brake fluid reservoir impedes easy access to the carburettor for adjustment of idle and CO measurements. Watch for the condition of the shrouds around the plugs. If they are rusty, they could be corroded inside as well, giving a poor spark, or intermittent cut out problems. There is a heater coil inside the inlet manifold for cold starts. This "hedgehog" was a cause of problems in earfy models. The fuel filter position should be copied by other manufacturers. Not only is it easy to get at, but it is transparent so that it can be seen if it is clogged or not. Fuel dirt does not cause much of a problem these days, but it you are in the habit of filling from cans in the yard you would be grateful for this filter. The item does not appear on the annual inspection, but it should be changed every 32,000km. Strictly it cannot be cleaned, it has to be renewed, but in practice large lumps of dirt can be washed off with petrol. The fuel lines are well protected from damage on their run to the 42-litre (9.2 gallon) tank. The alternator belt tension and condition need to be checked every 32,000km (20,000 miles). ThiE can only be achieved from beneath the vehicle, and is easily done while waiting for the oil to empty out. Take care not to get oil on the belt, however, as this can shorten its life. Adjustment is simple requiring two boltE to be slackened, but it may need oper jawed or ring spanners to do the job aE access space is tight. This is one of those jobs that benefits from being done slightly more often than suggested as it takes se little time. The electrical system on PoloE seems robust, well sealed and not generally a cause of trouble.
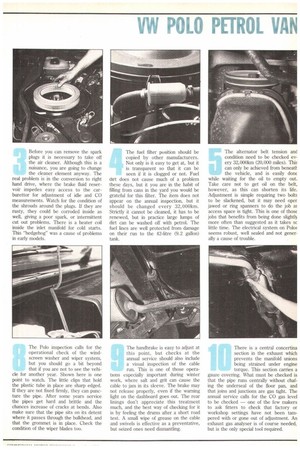
Unlike the Golf where the battery is exposed in the engine bay, the Polo's unit is tucked away behind the bulkhead. This makes it a bit more difficult to check, but less
likely to be shorted out by a carelessly dropped spanner. The battery is not maintenance free, and needs checking and topping up, but the casing is transparent, making it easy to see the levels without removing the caps, provided the casing is kept clean with a wipe every so often. Though it doesn't say so in the schedule, give the battery posts a good clean at the same time and smear some petroleum jelly over them — but don't overdo it. .
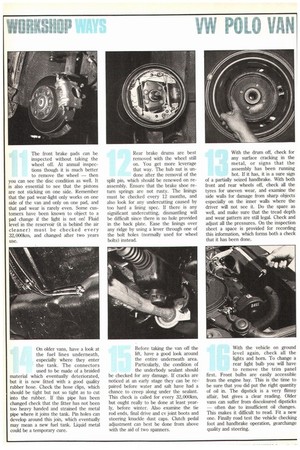
The cooling system is sealed with a refill point clearly visible. The only trouble is that the windscreen wash reservoir is next to it and just as big. If you have a new apprentice, it is worth gently pointing out the difference, before the inevitable happens. As long as the antifreeze concentration is sufficient, coolant can be left in for at least two years before a change. Some would leave it in far longer than that provided there is no history of head gasket problems, and that hoses are also in good condition. "Whizz" agreed that the rule of "what's not wrong doesn't need fixing" applied in this case. The Polo inspection calls for the operational check of the windscreen washer and wiper system, but you should go a bit beyond that if you are not to see the vehi
cle for another year. Shown here is one point to watch. The little clips that hold the plastic tube in place are sharp edged. If they are not fixed firmly, they can puncture the pipe. After some years service the pipes get hard and brittle and the chances increase of cracks at bends. Also make sure that the pipe sits on its detent where it passes through the bulkhead, and that the grommet is in place. Check the condition of the wiper blades too.
The handbrake is easy to adjust at this point, but checks at the annual service should also include a visual inspection of the cable run. This is one of those operations especially important during winter work, where salt and grit can cause the cable to jam in its sleeve. The brake may not release properly, even if the warning light on the dashboard goes out. The rear linings don't appreciate this treatment much, and the best way of checking for it is by feeling the drums after a short road test. A small wipe of grease on the cable and swivels is effective as a preventative, but seized ones need dismantling. 'fhere is a central concertina section in the exhaust which prevents the manifold unions being strained under engine torque. This section carries a gauze covering. What must be checked is that the pipe runs centrally without chafing the undersea] of the floor pan, and that joins and junctions are gas tight. The annual service calls for the CO gas level to be checked — one of the few makers to ask fitters to check that factory or workshop settings have not been tampered with or gone out of adjustment An exhaust gas analyser is of course needed, but is the only special tool required. The front brake pads can be inspected without taking the wheel off. At annual inspections though it is much better to remove the wheel — then you can see the disc condition as well. It is also essential to see that the pistons are not sticking on one side. Remember that the pad wear-light only works on one side of the van and only on one pad, and that pad wear is rarely even. Some customers have been known to object to a pad change if the light is not on! Fluid level in the reservoir (it is behind the air cleaner) must be checked every 32,000km, and changed after two years use. Rear brake drums are best removed with the wheel still on. You get more leverage that way. The hub nut is undone after the removal of the split pin, which should be renewed on reassembly. Ensure that the brake shoe return springs are not rusty. The linings must be checked every 12 months, and also look for any undercutting caused by too hard a lining spec. If there is any significant undercutting, dismantling will be difficult since there is no hole provided in the back plate. Ease the linings over any ridge by using a lever through one of the bolt holes (normally used for wheel bolts) instead. With the drum off, check for any surface cracking in the metal, or signs that the assembly has been running hot. If it has, it is a sure sign of a partially seized handbrake. With both front and rear wheels off, check all the tyres for uneven wear, and examine the side walls for damage from sharp objects especially on the inner walls where the driver will not see it. Do the spare as well, and make sure that the tread depth and wear pattern are still legal. Check and adjust all the pressures. On the inspection sheet a space is provided for recording this information, which forms both a check that it has been done.
On older vans, have a look at the fuel lines underneath, especially where they enter the tank. The connectors used to be made of a braided material which eventually deteriorated, but it is now fitted with a good quality rubber hose. Check the hose clips, which should be tight but not so tight as to cut into the rubber. If this pipe has been changed check that the fitter has not been too heavy handed and strained the metal pipe where it joins the tank. Pin holes can develop around this join, which eventually may mean a new fuel tank. Liquid metal could be a temporary cure. Before taking the van off the lift, have a good look around the entire underneath area. Particularly, the condition of the underbody sealant should • be checked for any damage. If cracks are noticed at an early stage they can be repaired before water and salt have had a chance to creep along under the sealant. This check is called for every 32,000km, but ought really to be done at least yearly, before winter. Also examine the tie rod ends, final drive and cv joint boots and steering knuckle dust caps. Clutch pedal adjustment can best be done from above with the aid of two spanners. With the vehicle on ground level again, check all the lights and horn. To change a rear light bulb you will have to remove the trim panel first. Front bulbs are easily accessible from the engine bay. This is the time to be sure that you did put the right quantity of oil in. The dipstick is a very flimsy affair, but gives a clear reading. Older vans can suffer from discoloured dipsticks — often due to insufficient oil changes. This makes it difficult to read. Fit a new one. Finally road test the vehicle checking foot and handbrake operation, gearchange quality and steering.