


Kit out for GRP repairs
Page 104
Page 105
If you've noticed an error in this article please click here to report it so we can fix it.
A GRP-plywood panelled body needs a quite different repair technique compared to a traditional riveted or huck-bolted structure
• It is no exaggeration to say that during the 1970s commercial vehicle bodybuilding underwent a major revolution. Both dryfreight and insulated bodies, traditionally of fabricated metal construction, using aluminium or steel skins on a post-and-stringer support structure, were subject to manufacturing cost pressures.
Building an all-metal body is a comparatively labour-intensive operation, notwithstanding the availability of cut-tolength extrusions in kits which are ready to assemble.
Commercial availability of non-metal one-piece panels, invariably skinned in a glass-reinforced plastic laminate, brought a number of operational attractions. Sidewalls and front bulkhead need no intermediate supporting framework. The box needs only a perimeter frame of raves, cantrail and corner posts, for which purpose-dimensioned aluminium or steel sections were quickly developed.
Selection of the appropriate panel thickness and "sandwich filling" gives the required insulation and/or strength characteristics, for different applications. For carrying loads at ambient temperatures, a GRP-coated solid plywood panel performs more than adequately. It even affords a small amount of insulation for vans delivering bread, for example, where bakeries previously added a ply lining to their metal bodies.
Although a GRP-plywood panelled body is much simpler to build than a traditional riveted or huck-bolted structure, and the finished box is, in general terms, tougher and better able to withstand minor knocks, bumps and scrapes, where repairs are needed, a quite different technique has to be applied.
Except for the most catastrophic accident damage, replacement of a complete sidewall panel is impracticable, from both a cost point of view and in manhours.
Technical Panel Industries, the biggest supplier of GRP-plywood dryfreight panelling, under the name Glasonit, provides detailed instructions for bodybuilders and end-users carrying out panel repairs. Repair kits and GRP patches are available from TN, as well as from other suppliers of bodybuilding sundries.
Repairs to Glasonit and its rival panels call for simple woodworking tools and rela tively unskilled labour. Essential materials include polyester resin, its matching catalyst, or hardener, and a so-called gelcoat.
When mixing the resin it is important that the correct amount of hardener is added according to the instructions and that they are thoroughly mixed. Glass fibre is hygroscopic; that is to say it absorbs moisture through capillary action. A final finish of gelcoat, or polyurethane paint, is essential to seal the glass-fibre and provide a visually acceptable surface. Cutting tools: When repairing GRP panels it is essential that the joint between the patch and the surrounding or adjacent panel is a good, close fit. This has, in the past, been difficult to achieve due to the difficulty of making straight saw cuts in GRP.
If a hand-held circular saw is to be used, it will be necessary to ensure that the saw blade has tungsten carbide tips, and that the blade is adjustable to 45 degrees.
A higher-revving compressed air operated saw (or drill with saw attachment) can be used with diamond tipped circular cutting discs. Its high speed gives straight, clean cuts. If a router is used, it is advisable that the cutter has tungsten carbide tips.
Working conditions: For the resin to cure properly and give a strong durable repair, ambient conditions must be compatible with the chemical reaction. Ideal working conditions are in temperatures around 15°C to 25°C (60°F-75°F) with 70% relative humidity. Working in the open air is not recommended and one should always ensure that the area to be repaired — of both the plywood core and the GRP laminated — is both clean and dry.
Temporary repairs to a damaged panel can be carried out easily and quickly. Due to the impact resistance of the material, heavy damage usually shows as a fracture in the skin, unless the panel has been penetrated, by fork truck tines for instance, but the chances are that the vehicle will stay serviceable, says TPI, though it must be borne in mind that on a frameless semi-trailer the sidewall panels contribute crucially to the whole structure's bending strength.
To ensure that a temporary repair remains watertight, damaged areas need only be covered with a thin sheet of exterior grade plywood, simply glued on with a rubber-based adhesive and screwed to the panel.
When superficial damage occurs, operators are strongly advised to effect temporary repairs quickly, before moisture can get into the plywood. Sometimes a temporary repair may be effected by using a filler such as Isopon.
Where damage is severe enough to have punctured the plywood or penetrated it to a significant depth, an insert ol new pre-coated panel material must be applied, to a hole cut around the damaged area. In the case of TPI, pieces of Glasonit measuring 2,390 by 1,220mm are available in all standard panel thicknesses, from which repair inserts can be cut.
If the body shell has been holed and the repair area does not exceed one square metre, the following repair procedure is suggested.
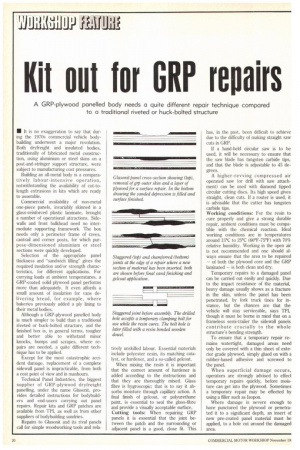
1 Cut back the damaged area of the panel to sound, dry plywood, chamfering the edges of the holes to an angle of 450, so that the opening is effectively larger on the inside of the vehicle than the outside.
2 Cut a piece from the repair panel so that it fits neatly into the hole in the vehicle panel.
3 Coat the exposed plywood edges of both the repair patch and panel with cataUsed polyester resin or waterproof woodworking glue, insert the patch and apply pressure. A prop wedged across the interior is a convenient method. In addition the patch may be pinned in position with panel pins. If polyester resin is used, a setting time of at least 30 minutes should be allowed in temperatures of 15/25°C (60/75°F).
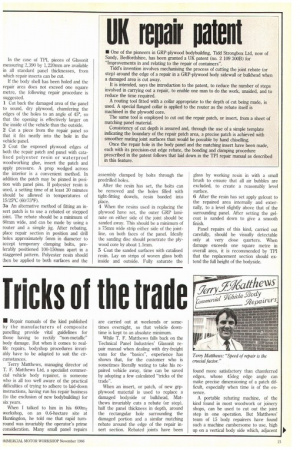
3a An alternative method of fitting an insert patch is to use a rebated or stepped joint. The rebate should be a minimum of 60mm wide, and can be made by using a router and a simple jig. After rebating, place repair section in position and drill holes approximately 5mm in diameter to accept temporary clamping bolts, preferably positioned 100-150mm apart in a staggered pattern. Polyester resin should then be applied to both surfaces and the assembly clamped by bolts through the predrilled holes.
After the resin has set, the bolts can be removed and the holes filled with tight-fitting dowels, resin bonded into place.
4 When the resins used in replacing the plywood have set, the outer GRP laminate on either side of the joint should be sanded away. This should be a minimum of a 75nun wide strip either side of the jointline, on both faces of the panel. Ideally the sanding disc should penetrate the plywood core by about 1.5mrn.
5 Coat the sanded surfaces with catalised resin. Lay on strips of woven glass both inside and outside. Fully saturate the glass by working resin in with a small brush to ensure that all air bubbles are excluded, to create a reasonably level surface.
6 After the resin has set apply gelcoat to the repaired area internally and externally, to a level slightly above that of the surrounding panel. After setting the gelcoat is sanded down to give a smooth finish.
Panel repairs of this kind, carried out carefully, should be visually detectable only at very close quarters. When damage exceeds one square metre in overall area, it is recommended by TPI that the replacement section should extend the full height of the bodyside.