 1
1 2
2 3
3 4
4 5
5 6
6 7
7 8
8 9
9 10
10 11
11 12
12 13
13 14
14 15
15 16
16 17
17 18
18 19
19 20
20 21
21 22
22 23
23 24
24 25
25 26
26 27
27 28
28 29
29 30
30 31
31 32
32 33
33 34
34 35
35 36
36 37
37 38
38 39
39 40
40 41
41 42
42 43
43 44
44 45
45 46
46 47
47 48
48 49
49 50
50 51
51 52
52 53
53 54
54 55
55 56
56 57
57 58
58 59
59 60
60 61
61 62
62 63
63 64
64 65
65 66
66 67
67 68
68 69
69 70
70 71
71 72
72 73
73 74
74 75
75 76
76 77
77 78
78 79
79 80
80 81
81 82
82 83
83 84
84 85
85 86
86 87
87 88
88 89
89 90
90 91
91 92
92 93
93 94
94 95
95 96
96 97
97 98
98 99
99 100
100 101
101 102
102 103
103 104
104 105
105 106
106 107
107 108
108 109
109 110
110 111
111 112
112 113
113 114
114 115
115 116
116 117
117 118
118 119
119 120
120 121
121 122
122 123
123 124
124 125
125 126
126 127
127 128
128 129
129 130
130 131
131 132
132 133
133 134
134 135
135 136
136 137
137 138
138 139
139 140
140 141
141 142
142 143
143 144
144 145
145 146
146 147
147 148
148 • When General Motors pulled out of the UK commercial
Page 129
Page 130
Page 131
Page 132
If you've noticed an error in this article please click here to report it so we can fix it.
vehicle market in 1986, many fitters and operators alike mourned the passing of a simple, workmanlike range of trucks.
While Bedfords did create problems for fitters they were predominantly straightforward mechanical ones and not caused by malfunctions in elec trical black boxes so common in modern vehicles. However, David j B Brown bought the Dunstable plant in order that it should produce trucks again and devotees of no-nonsense trucks breathed a sigh of relief.
Workshop took an early opportunity to watch a service on AWD's relaun
ched TL to check if it is still a simple truck and to evaluate the changes. While much remains of the old Bed ford, the new offering has different engine, clutch and gearbox options. The chassis frame behind the rear axle is now parallel in order to accept a tail-lift without modification, the rest of the chassis is as-was.
There are three levels of service on the TL, they are designated A, B and C. Following the initial service at 2,000km or 1,200 miles the regular services are carried out at 15,000km or 9,000 miles intervals. Every second service is an A-service followed by a 'B' then `C' alternatively. Standard service times are: 'A' two hours, 'B' three hours, 'C' 9.9 hours.
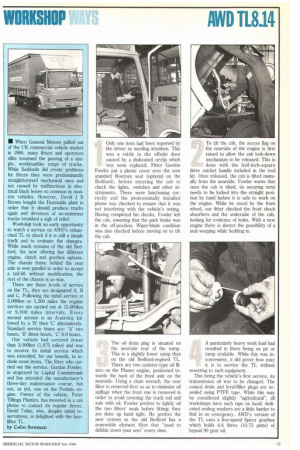
Our vehicle had covered fewer than 3,000km (1,875 miles) and was to receive its initial service which was extended, for our benefit, to include most items. The fitter who car ried out the service, Gordon Fowler, is employed by Capital Commercials and has attended the manufacturer's, three-day maintenance course, but not, as yet, one on the Perkins en gffie. Owner of the vehicle, Peter Tillings Plastics, has invested in a cab phone to contact its regular driver, David Tobin, who, despite initial reservations, is delighted with the facelifter IL, by Colin Sowman Only one item had been reported by the driver as needing attention. This was a rattle in the offside door caused by a dislocated circlip which was soon replaced. Fitter Gordon Fowler put a plastic cover over the now standard Bostrom seat (optional on the Bedford), before entering the cab to check the lights, switches and other instruments. These were functioning correctly and the professionally installed phone was checked to ensure that it was not interfering with the vehicle's wiring. Having completed his checks, Fowler left the cab, ensuring that the park brake was in the off-position. Wiper-blade condition was also checked before moving on to tilt the cab.
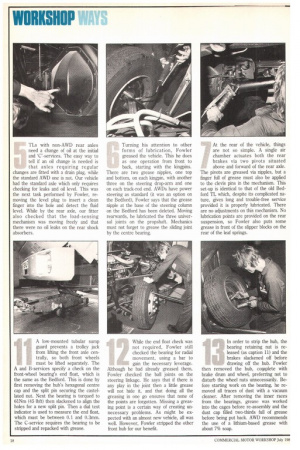
The oil drain plug is situated on the nearside rear of the sump. This is a slightly lower sump than on the old Bedford-engined TL. There are two canister-type oil fil
ters on the Phaser engine, positioned towards the back of the front axle on the nearside. Using a chain wrench, the rear filter is removed first so as to minimise oil spillage when the front one is removed in order to avoid covering the track rod and axle with oil. Fowler prefers to lightly oil the two filters' seals before fitting; they are done up hand tight. He prefers the new system as the old Bedford has a renewable element filter that "used to dribble down your arm" every time.
To tilt the cab, the access flap on the nearside of the engine is first raised to allow the cab lock-down mechanism to be released. This is done with the half-inch-square drive ratchet handle included in the tool kit. Once released, the cab is tilted manually from the nearside. Fowler warns that once the cab is tilted, its securing strut needs to be locked into the straight position by hand before it is safe to work on the engine. While he stood by the front wheel, our fitter checked the front shock absorbers and the underside of the cab, looking for evidence of leaks. With a new engine there is always the possibility of a seal weeping while bedding in.
A particularly heavy work load had resulted in there being no pit or ramp available. While this was inconvenient, it did prove how easy it is to service the TL without resorting to such equipment.
This being the vehicle's first service, its transmission oil was to be changed. The conical drain and level/filler plugs are resealed using PTFE tape. While this may be considered slightly "agricultural", all workshops have such tape on hand; dedicated sealing washers are a little harder to find in an emergency. AWD's version of the TL uses a five-speed Spicer gearbox which holds 6.4 litres (10.75 pints) of hypoid 90 gear oil. 'I'Ls with non-AWD rear axles need a change of oil at the initial and 'C'-services. The easy way to tell if an oil change is needed is that axles requiring regular changes are fitted with a drain plug, while the standard AWD one is not. Our vehicle had the standard axle which only requires checking for leaks and oil level. This was the next task performed by Fowler, removing the level plug to insert a clean finger into the hole and detect the fluid level. While by the rear axle, our fitter also checked that the load-sensing mechanism was moving freely and that there were no oil leaks on the rear shock absorbers.
1
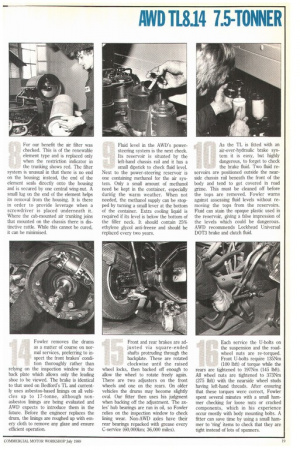
A low-mounted tubular sump guard prevents a trolley jack from lifting the front axle centrally, so both front wheels must be lifted separately. The A and B-services specify a check on the front-wheel bearing's end float, which is the same as the Bedford. This is done by first removing the hub's hexagonal centre cap and the split pin securing the castellated nut. Next the bearing is torqued to 61Nm (45 lbft) then slackened to align the holes for a new split pin. Then a dial test indicator is used to measure the end float, which must be between 0.1 and 0.3rnm. The C-service requires the bearing to be stripped and repacked with grease. Turning his attention to other forms of lubrication, Fowler greased the vehicle. This he does as one operation from front to back, starting with the kingpins. There are two grease nipples, one top and bottom, on each kingpin, with another three on the steering drop-arm and one on each track-rod end. AWDs have power steering as standard (it was an option on the Bedford), Fowler says that the grease nipple at the base of the steering column on the Bedford has been deleted. Moving rearwards, he lubricated the three universal joints on the propshaft. Mechanics must not forget to grease the sliding joint by the centre bearing.
While the end float check was not required, Fowler still checked the bearing for radial movement, using a bar to gain the necessary leverage. Although he had already greased them, Fowler checked the ball joints on the steering linkage. He says that if there is any play in the joint then a little grease will not hide it, and that doing all the greasing in one go ensures that none of the points are forgotten. Missing a greasing point is a certain way of creating unnecessary problems. As might be expected with an almost new vehicle, all was well. However, Fowler stripped the other front hub for our benefit. At the rear of the vehicle, things are not so simple. A single air chamber actuates both the rear brakes via two pivots situated above and forward of the rear axle. The pivots are greased via nipples, but a finger full of grease must also be applied to the clevis pins in the mechanism. This set-up is identical to that of the old Bedford IL which, despite its complicated nature, gives long and trouble-free service provided it is properly lubricated. There are no adjustments on this mechanism. No lubrication points are provided on the rear suspension, so Fowler also puts some grease in front of the slipper blocks on the rear of the leaf springs.
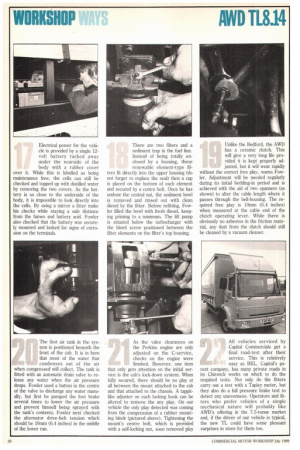
In order to strip the hub, the bearing retaining nut is released (as caption 11) and the brakes slackened off before drawing off the hub. Fowler then removed the hub, complete with brake drum and wheel, preferring not to disturb the wheel nuts unnecessarily. Before starting work on the bearing, he removed all traces of dust with a vacuum cleaner. After removing the inner races from the bearings, grease was worked into the cages before re-assembly and the dust cap filled two-thirds full of grease before being put back. AWD recommends the use of a lithium-based grease with about 7% soap. For our benefit the air filter was checked. This is of the renewable element type and is replaced only when the restriction indicator in the trunking shows red. The filter system is unusual in that there is no end on the housing; instead, the end of the element seals directly onto the housing and is secured by one central wing-nut. A small lug on the end of the element helps its removal from the housing. It is there in order to provide leverage when a screwdriver is placed underneath it. Where the cab-mounted air trunking joins that mounted on the chassis there is distinctive rattle. While this cannot be cured, it can be minimised.
Fowler removes the drums as a matter of course on normal services, preferring to inspect the front brakes' condition thoroughly rather than relying on the inspection window in the back plate which allows only the leading shoe to be viewed. The brake is identical to that used on Bedford's TL and currently uses asbestos-based linings on all vehicles up to 17-tonne, although nonasbestos linings are being evaluated and AWD expects to introduce them in the future. Before the engineer replaces the drum, the linings are roughed up with emery cloth to remove any glaze and ensure efficient operation. Fluid level in the AWD's powersteering system is the next check. Its reservoir is situated by the left-hand chassis rail and it has a small dipstick to check fluid level.
Next to the power-steering reservoir is one containing methanol for the air system. Only a small amount of methanol need be kept in the container, especially during the warm weather. When not needed, the methanol supply can be stopped by turning a small lever at the bottom of the container. Extra cooling liquid is required if its level is below the bottom of the filler neck. It should contain 25% ethylene glycol anti-freeze and should be replaced every two years.
Front and rear brakes are adjusted via square-ended shafts protruding through the backplate. These are rotated clockwise until the raised wheel locks, then backed off enough to allow the wheel to rotate freely again. There are two adjusters on the front wheels and one on the rears. On older vehicles the drums may become slightly oval. Our fitter then uses his judgment when backing off the adjustment. The axles' hub bearings are run in oil, so Fowler relies on the inspection window to check lining wear. Non-AWD axles have their rear bearings repacked with grease every C-service (60,000km; 36,000 miles). As the TL is fitted with an air-over-hydraulic brake system it is easy, but highly dangerous, to forget to check the brake fluid. Two fluid re servoirs are positioned outside the nearside chassis rail beneath the front of the body and tend to get covered in road grime. This must be cleaned off before the tops are removed. Fowler warns against assessing fluid levels without removing the tops from the reservoirs. Fluid can stain the opaque plastic used in the reservoir, giving a false impression of the levels which could be dangerous. AWD recommends Lockhead Universal DOT3 brake and clutch fluid.
Each service the U-bolts on the suspension and the roadwheel nuts are re-torqued. Front U-bolts require 135Nm (100 lbft) of torque while the rears are tightened to 197Nm (145 lbft). All wheel nuts are tightened to 373Nm (275 lbft) with the nearside wheel studs having left-hand threads, After ensuring that these torques were correct, Fowler spent several minutes with a small hammer checking for loose nuts or cracked components, which in his experience occur mostly with body mounting bolts. A fitter can save time by using a small hammer to 'ring' items to check that they are tight instead of lots of spanners.
Electrical power for the vehicle is provided by a single 12volt battery tucked away under the nearside of the body with a rubber cover over it. While this is labelled as being maintenance free, the cells can still be checked and topped up with distilled water by removing the two covers. As the battery is so close to the underside of the body, it is impossible to look directly into the cells. By using a mirror a fitter make his checks while staying a safe distance from the fumes and battery acid. Fowler also checked that the battery was securely mounted and looked for signs of corrosion on the terminals.
The first air tank in the system is positioned beneath the front of the cab. It is in here that most of the water that condenses out of the air when compressed will collect. The tank is fitted with an automatic drain valve to release any water when the air pressure drops. Fowler used a button in the centre of the valve to discharge any water manually, but first he pumped the foot brake several times to lower the air pressure and prevent himself being sprayed with the tank's contents. Fowler next checked the alternator drive-belt tension which should be 10mm (0.4 inches) in the middle of the lower run. There are two filters and a sediment trap in the fuel line. Instead of being totally enclosed by a housing, these renewable element-type filters fit directly into the upper housing (do not forget to replace the seal) then a cap is placed on the bottom of each element and secured by a centre bolt. Once he has undone the central nut, the sediment bowl is removed and rinsed out with clean diesel by the fitter. Before refitting, Fowler filled the bowl with fresh diesel, keeping priming to a minimum. The lift pump is situated below the turbocharger with the bleed screw positioned between the filter elements on the filter's top housing.
As the valve clearances on the Perkins engine are only adjusted on the C-service, checks on the engine were finished. However, one item that only gets attention on the initial service is the cab's lock-down system. When fully secured, there should be no play at all between the mount attached to the cab and that attached to the chassis. A tappitlike adjuster on each locking hook can be altered to remove the any play. On our vehicle the only play detected was corning from the compression of a rubber mounting block (pictured above). Tightening the mount's centre bolt, which is provided with a self-locking nut, soon removed play Unlike the Bedford, the AWL) has a ceramic clutch. This will give a very long life provided it is kept properly adjusted, but it will wear rapidly without the correct free play, warns Fowler. Adjustment will be needed regularly during its initial bedding-in period and is achieved with the aid of two spanners (as shown) to alter the cable length where it passes through the bell-housing. The required free play is lOmm (0.4 inches) when measured at the cable end of the clutch operating lever. While there is obviously no asbestos in the friction material, any dust from the clutch should still be cleaned by a vacuum cleaner.
All vehicles serviced by Capital Commercials get a final road-test after their service, This is relatively easy as BEL, Capital's parent company, has many private roads in its Chiswick works on which to do the required tests. Not only do the fitters carry out a test with a Tapley meter, but they also do a full pressure brake test to detect any unevenness. Operators and fitters who prefer vehicles of a simple mechanical nature will probably like AWD's offering in the 7.5-tonne market and, if the driver of our vehicle is typical, the new TL could have some pleasant surprises in store for them too.