PROTECTING
Page 44

Page 45

If you've noticed an error in this article please click here to report it so we can fix it.
YOUR REARS!
Reversing is when vans are at their most vulnerable and when unsightly, costly damage occurs—particularly in dark, congested areas. One Ascot-based firm offers a range of bespoke bumpers that, for a small outlay, will save you all the hassle. Bryan Jarvis watches a van being fitted out.
Running a fleet of
delivery vans doesn't get any easier—fuel, labour and maintenance charges are all creeping up; so too are capital costs.
But to operate efficiently, it is sometimes worthwhile spending a little extra to protect your original investment.
Having forked out something like 124,000 on, for example, a new Mercedes-Benz Sprinter van, adding another14.00 or so for a bumper with tow bar makes sound economic sense—after all, it only takes one unguarded moment for a driver to cause some expensive body damage.
The cost of replacement parts for a light unit, door and bumpercum-valance, plus labour charges and vehicle downtime versus the price of a safety bar is absolutely no contest.
One manufacturer offering vehicle protection is Hope Technical Developments, which has been making the Safe-T-Bar for nearly 23 years.
The company was initially founded by 79-year old Fred Hope, who is better known for inventing the now-discontinued Anti-fack-Knife device.
Based in Ascot in Berkshire, Hope Technical also produces the Scrutineer CV air brake and lighting diagnostic unit alongside the Safe-T-Bar range of rear protection systems.
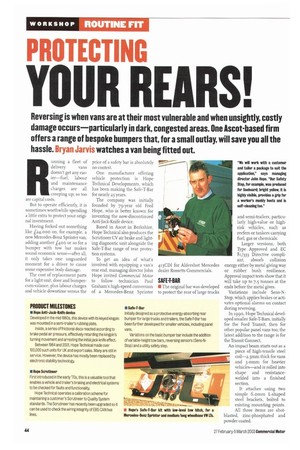
To get an idea of what's involved with equipping a van's rear end, managing director John Hope invited Commercial Motor to follow technician Paul Graham's high-speed conversion of a Mercedes-Benz Sprinter
413CDI for Aldershot Mercedes dealer Rossetts Commercials.
SAFE-T-BAR • 'the original bar was developed to protect the rear of large trucks
and semi-trailers, particularly high-value or highrisk vehicles, such as reefers or tankers carrying fuel, gas or chemicals.
Larger versions, both Type Approved and EC 81/333 Directive compliant, absorb collision energy either by metal giving way or rubber bush resilience. Approval impact tests show that it will take up to 7.5 tonnes at the ends before the metal gives.
Variations include SensN Stop, which applies brakes or activates optional alarms on contact during reversing.
In 1990, Hope Technical developed smaller Safe-T-Bars, initially for the Ford Transit, then for other popular panel vans too; the latest addition to the range is for the Transit Connect.
An impact beam starts out as a piece of high-tensile steel coil-2.5mm thick for vans and 3.omm for heavier vehicles—and is rolled into shape and resistancewelded into a finished section.
It attaches using two simple 6.omm L-shaped steel brackets, bolted to existing mounting points. All three items are shotblasted, zinc-phosphated and powder coated.
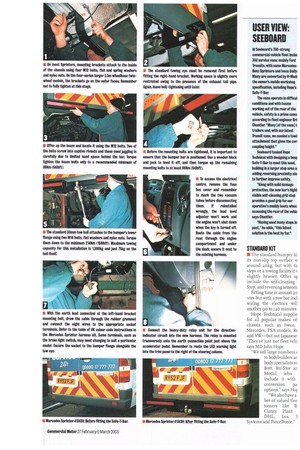
le On most Sprinters, mounting brackets attach to the inside of the chassis using four M12 bons, flat and spring washers and nyloc nuts. On the four-series larger 3.5m wheelbase twinwheel models, the brackets go on the outer faces. Remember not to fully tighten at this stage.
The standard towing eye must be removed first before fitting the right-hand bracket. Working space is slightly more restricted owing to the presence of the exhaust tail pipe. Again, leave bolt-tightening until later.
i Offer up the beam and locate It using the M12 baits. Two of the bolts screw into captive rivnuts and these need juggling in carefully due to limited hand space behind the bar. Torque tighten the beam bolts only to a recommended minimum of B6Nm (Sillbft).
Before the mounting bolts are tightened, it is important to ensure that the bumper bar is positioned. Use a wooden block and jack to level it off, and then torque up the remaining mounting bolts to at least 86Nm (64Ibft).
II The standard 50mm tow ball attaches to the bumper's lower flange using two M16 bolts, flat washers and nylon nuts. Torque them down to the minimum 214Nm (158Ibft). Maximum towing capacity for this installation is 1,500kg and just 75kg on the ball itself.
To access the electrical centre, remove the fuse box cover and remember to mark the two vacuum tubes before disconnecting them. If reinstalled wrongly, the load level adjuster won't work and the engine won't shut down when the key is turned off. Route the cable from the rear, through the engine compartment and under the dash; secure it next to the existing harness.
I With the earth lead connected at the left-hand bracket mounting bolt, draw the cable through the rubber grommet and connect the eight wires to the appropriate socket terminals. Refer to the table of UK colour code instructions in the Mercedes Sprinter harness kit. Some terminals, such as the brake light switch, may need changing to suit a particular model. Secure the socket to the bumper flange alongside the tow eye. Connect the heavy-duty relay unit for the directionindicator circuit into the new harness. The relay is mounted transversely onto the earth connection point just above the accelerator pedal. Remember to route the LED warning light into the trim panel to the right of the steering I:01MM.


