


FORD TRANSIT 1001
Page 93
Page 92
Page 94
If you've noticed an error in this article please click here to report it so we can fix it.
The load sensing valve, which is bolted to the chassis above and to the left of the rear axle, also must be checked at every service. The arm, which is connected to the back axle by a spring in tension, pulls against a small compression spring the other side of the arms fulcrum.
There is a plunger just by the fulcrum which must move when the arm is pulled down. John has never found a load sensing valve that needed readjusting, but they must always be checked.
Always run your fingers over the U bolts that hold the axle to the springs, as these can break above the spring. The universal joints in the Transit propshaft are sealed for life. There are no grease nipples fitted, and the bearings are crimped into, the yokes, rather than re tained with circlips. Once worn, the propshaft has to be replaced.
Since the Y registration vehicles, the yokes have been beefed up, as if run in a worn condition, the yokes tended to crack around the bearings. Although this means less trouble in the drive train, the new type of UJ no longer bends enough to allow the prop-shaft to be withdrawn from the back of the gearbox, once the centre bearing has been removed. Remove the flange at the rear axle on late models. A suspension feature that has been improved on the later Transits are the rubber bushes in the springs and spring shackles. On earlier models, the bolts ran directly in the rubber of the bushes. More recent models have a steel sleeve moulded into the centre of the bush, which no longer give trouble.
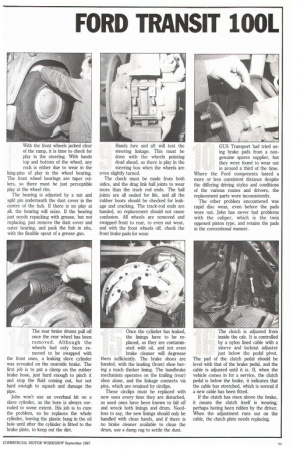
To check for wear in the bushes, place a lever in between the shackle mounting and the leaf and give it a hefty tug downwards. Any play should be apparent. As with the rear axle, the U bolts over the spring must be checked for cracking. The new type of hushes can be fitted in place of the earlier type of unlined bush. With the front wheels jacked clear of the ramp, it is time to check for play in the steering. With hands top and bottom of the wheel, any rock is either due to wear in the king-pins of play in the wheel bearing. The front wheel bearings are taper rollers, so there must be just perceptible play at the wheel rim.
The bearing is adjusted by a nut and split pin underneath the dust cover in the centre of the hub. If there is no play at all, the bearing will seize. If the bearing just needs repacking with grease, but not replacing, just remove the dust cover and outer bearing, and pack the hub in situ, with the flexible spout of a grease gun. Hands fore and aft will test the steering linkage. This must be done with the wheels pointing dead ahead, as there is play in the steering box when the wheels are even slightly turned.
The check must be made from both sides, and the drag link ball joints to wear more than the track rod ends. The ball joints are all sealed for life, and all the rubber boots should be checked for leakage and cracking. The track-rod ends are handed, so replacement should not cause confusion. All wheels are removed and swapped front to rear, to even out wear, and with the front wheels off, check the front brake pads for wear. GUS Transport had tried using brake pads from a nongenuine spares supplier, but they were found to wear out in around a third of the time. Where the Ford components lasted a more or less consistent distance despite the differing driving styles and conditions of the various routes and drivers, the replacement parts wore inconsistently.
The other problem encountered was rapid disc wear, even before the pads wore out. John has never had problems with the caliper, which is the twin opposed piston type, and retains the pads in the conventional manner.
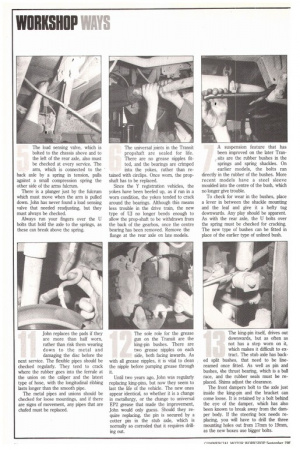
John replaces the pads if they are more than half worn, rather than risk them wearing down to the metal and damaging the disc before the next service. The flexible pipes should be checked regularly. They tend to crack where the rubber goes into the ferrule at the union on the caliper and the latest type of hose, with the longitudinal ribbing lasts longer than the smooth pipe.
The metal pipes and unions should be checked for loose mountings, and if there are signs of movement, any pipes that are chafed must be replaced. The sole role for the grease gun on the Transit are the king-pin bushes. There are two grease nipples on each side, both facing inwards. As with all grease nipples, it is vital to clean the nipple before pumping grease through It.
Until two years ago, John was regularly replacing king-pins, but now they seem to last the life of the vehicle. The new ones appear identical, so whether it is a change in metallurgy, or the change to universal EP2 grease that made the improvement, John would only guess. Should they require replacing, the pin is secured by a cotter pin in the stub axle, which is normally so corroded that it requires drilling out. The king-pin itself, drives out downwards, but as often as not has a step worn on it, which makes it difficult to extract. The stub axle has back ed split bushes, that need to be linereamed once fitted. As well as pin and bushes, the thrust bearing, which is a ball race, and the rubber seals must be replaced. Shims adjust the clearance.
The front dampers bolt to the axle just inside the king-pin and the bracket can come loose. It is retained by a bolt behind the eye of the damper, which has also been known to break away from the damper body. If the steering box needs replacing, you will have to drill the three mounting holes out from 17mm to 19nun, as the new boxes use bigger bolts. The rear brake drums pull off once the rear wheel has been removed. Although the wheels had only been removed to be swapped with the front ones, a leaking slave cylinder was revealed on the nearside brake. The first job is to put a clamp on the rubber brake hose, just hard enough to pinch it and stop the fluid coming out, but not hard enthigh to squash and damage the pipe.
John won't use an overhaul kit on a slave cylinder, as the bore is always corroded to some extent His job is to cure the problem, so he replaces the whole cylinder, leaving the plastic bung in the oil hole until after the cylinder is fitted to the brake plate, to keep out the dirt. Once the cylinder has leaked the linings have to be replaced, as they are contaminated with oil, and not even brake cleaner will degrease them sufficiently. The brake shoes are handed, with the leading (front) shoe having a much thicker lining. The handbrake mechanism operates on the trailing (rear) shoe alone, and the linkage connects via pins, which are retained by circlips.
These circlips must be replaced with new ones every time they are disturbed, as used ones have been known to fall off and wreck both linings and drum. Needless to say, the new linings should only be handled with clean hands, and if there is no brake cleaner available to clean the drum, use a damp rag to settle the dust. The clutch is adjusted from inside the cab. It is controlled by a nylon lined cable with a sleeve and locknut adjuster just below the pedal pivot. The pad of the clutch pedal should be level with that of the brake pedal, and the cable is adjusted until it is. If, when the vehicle comes in for a service, the clutch pedal is below the brake, it indicates that the cable has stretched, which is normal if a new cable has been fitted.
If the clutch has risen above the brake, it means the clutch itself is wearing, perhaps having been ridden by the driver. When the adjustment runs out on the cable, the clutch plate needs replacing. Before leaving the cab, check the seat mountings, and give the seat belt a tug to check that the inertia reel is working properly. The sliding drivers door, and its lock, get a fair hammering on the White Arrow vans, so they are checked and lubricated at every service.
To gain access to beneath the bonnet, pull the catch inside the cab. This operates through a cable which runs behind the battery, where it can corrode and seize, and then round to the front, and back on itself to operate the catch. If it does seize, oil can be worked into it through the outer, although this should not happen if it is oiled at every service. The vacuum pump, which draws air out of the brake servo, is belt driven, and mounted on the off-side front of the engine. The pipe that connects pump to servo can crack where it enters the back of the pump.
Another connection that can fail is the heavy electrical cable that runs from the positive side of the battery to the solenoid. Being copper, and with one end connected to the flexibly mounted engine, it tends to work harden and crack. This is not always obvious, as it breaks under the plastic sleeve where the wire attaches to the terminal on the solenoid. If the entire electrical system goes dead, check this first. At the front of the engine, check that the oil seals behind either the crankshaft pulley or the vacuum pump pulley are not leaking. To re place them, it is necessary to remove the bumper, and headlight shrouds, and then the entire radiator grill, which is retained by a series of lOrnm bolts. The radiator can then be easily removed, giving good access to the engine.
While checking for leaks, the two belts should be checked for tension, and the fan pulled hard up and down to check for play in the water pump bearings. The fan has a viscous coupling inside its hub which can seize. The fan should turn with just light resistance (without the engine running).
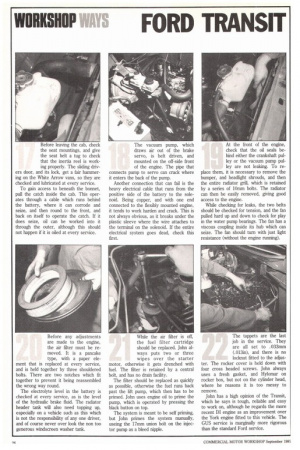
Before any adjustments are made to the engine, the air filter must be removed. It is a pancake type, with a paper ele ment that is replaced at every service, and is held together by three shouldered bolts. There are two notches which fit together to prevent it being reassembled the wrong way round.
The electrolyte level in the battery is checked• at every service, as is the level of the hydraulic brake fluid. The radiator header tank will also need topping up, especially on a vehicle such as this which is not the responsibility of any one driver, and of course never over look the non too generous windscreen washer tank. While the air filter is off, the fuel filter cartridge should be replaced. John always puts two or three wipes over the starter motor, otherwise it gets drenched with fuel. The filter is retained by a central bolt, and has no drain facility.
The filter should be replaced as quickly as possible, otherwise the fuel runs back past the lift pump, which then has to be primed. John uses engine oil to prime the pump, which is operated by pressing the black button on top.
The system is meant to be self priming, but John primes the system manually, useing the 17mm union bolt on the injector pump as a bleed nipple. The tappets are the last job in the service. They are all set to .033mm (.013in), and there is no locknut fitted to the adjuster. The rocker cover is held down with four cross headed screws. John always uses a fresh gasket, and Hylomar on rocker box, but not on the cylinder head, where he reasons it is too messy to remove.
John has a high opinion of the Transit, which he says is tough, reliable and easy to work on, although he regards the more recent DI engine as an improvement over the York engine fitted to this vehicle. The GUS service is marginally more rigorous than the standard Ford service.