


ROUTINE AN RECORDS
Page 42
Page 43
Page 44
If you've noticed an error in this article please click here to report it so we can fix it.
DECORDS are the most important part of any planned -11-x maintenance system for without them, any system, regardless of fleet size, will fall down. At all times throughout the vehicle's life it is essential to know how much it is costing to operate.
When a new vehicle is delivered, ask the manufacturer for its build sheet. With this detailed specification it is then quite a simple matter to record all maintenance, servicing, mileage, tyre replacement, etc. In the case of a large fleet, this will mean employing a records clerk.
Provided the specification is correct, and this is most important, there should be—with a bit of luck—about three months' trouble-free running, simply with routine servicing. But keep new vehicles in the workshops for a day or two so that fitters can tighten all loose nuts and bolts. It is amazing what one can find in this respect!
Prerequisites
Any form of planned maintenance depends on certain prerequisites. There must be proper tools and facilities, properly used by skilled, alert and conscientious mechanics. Drivers must avoid abusing equipment and report faults promptly and accurately. And equipment manufacturers must furnish durable reliable products, capable of being properly maintained.
Little need be said about normal servicing—oil changes and topping-up, filter-checking and the like. This can be done on a time or mileage basis. With a large fleet it is necessary and timesaving, to fit all vehicles with automatic lubrication.
But of paramount importance is regular inspection and adjustment. It can cut the cost of replacing parts and lengthen their service life. Even more important: it can significantly reduce road failures, always more costly and often resulting in damage to parts other than those which caused the breakdown.
Regular, planned inspection is the nucleus of any sound maintenance scheme and it is the cheapest insurance.
The essence of an efficient maintenance programme is teamwork, starting with the driver.
Report defects
The average driver will inspect such items as tyres, water-level, oil-level and batteries before starting his journey, as these will have a direct bearing on his safety. But provision should be made for drivers to report defects—however slight—noted while on the road. These should be dealt with as urgently as necessary.
For routine maintenance it is seldom possible to make a vehicle available at a precise mileage. It should be done within 2,000-3,000 miles of the optimum. But scheduling must not be done merely at the management's convenience.
Use of one of the many simple pegboard wall-chart systems should indicate when a vehicle is due for inspection. Then I suggest this routine should be followed:—
Check the record of the vehicle in for inspection. This will confirm when the last inspection was executed and also give repair and maintenance costs to date.
If possible, load the vehicle and road test it Over a predetermined course, checking brake performance and steering, etc. Also ask the driver for a brief report.
Before entering the workshops it is vital that the vehicle should be steam-cleaned: dirt can hide faults apart from making repairs more difficult. With the vehicle over the pit, fitters and supervisor should check it from front to rear, noting all defects. With the vehicle over the pit, fitters and supervisor should check it from front to rear, noting all defects.
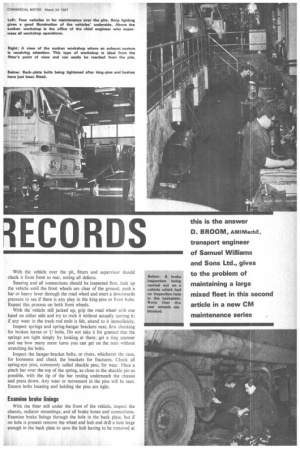
the vehicle until the front wheels are clear of the ground, push a
Steering and all connections should be inspected first. Jack up carried out on a inspection being vehicle which had Below: A brake bar or heavy lever through the road wheel and exert a downwards no inspection hole
in the bookplate.
pressure to see if there is any play in the king-pins or front hubs. Note that the Repeat this process on both front wheels. rear wheels are With the' vehicle still jacked up, grip the road wheel with one bkrcicid. hand on either side and try to rock it without actually turning it; if any wear in the track-rod ends is felt, attend to it immediately.
Inspect springs and spring-hangar brackets next, first checking for broken leaves or U bolts. Do not take it for granted that the springs are tight simply by looking at them; get a ring spanner and see how many more turns you can get on the nuts without stretching the bolts.
Inspect the hangar-bracket bolts, or rivets, whichever the case, for looseness and check the brackets for fractures. Check all spring-eye pins, commonly called shackle pins, for wear. Place a pinch bar over the top of the spring, as close to the shackle pin as possible, with the tip of the bar resting underneath the chassis and press down. Any wear or movement in the pins will be seen. Ensure bolts locating and holding the pins are tight.
Examine brake linings
With the fitter still under the front of the vehicle, inspect the chassis, radiator mountings, and all brake hoses and connections. Examine brake linings through the hole in the back plate, but if no hole is present remove the wheel and hub and drill a hole large enough in the back plate to save the hub having to be removed at the next inspection. Before refitting the hub, wash the bearings in clean paraffin and inspect the balls or rollers for wear; repack the front hubs with fresh grease and adjust.
Remember never to trust the vehicle's weight to a trolley or bottle jack alone: stands should be placed under the axles, especially if a fitter is beneath the vehicle.
Before the vehicle is lowered on its wheels, the brake pedal should be gradually depressed while a fitter rotates the wheels. As soon as one wheel starts to grip, the brake pedal should be kept down while the fitter checks the opposite wheel to see whether it, too, is gripping. If not, adjust so that both front-wheel brakes act in unison.
Next, inspect the gearbox and mountings carefully for loose bolts, particularly the banjo bolts around the gearbox face. And remember that you can never check the prop-shaft bolts too often, so much of a pounding do they take. At the same time, ensure that the gearbox companion flange is tight.
Inspect centre bearing
Then examine the centre bearing for lift or wear by pushing upwards and pulling downwards, also noting the bolts retaining it to the cross-member. All cross-members should be examined for fractures and fuel tank retaining bolts and straps checked for tightness. Ensure the straps have not worn a groove in the tank or a leak will soon follow. Examination procedure for the rear axle should include a check for oil leaks at the pinion seal.
All body belts should be checked and replaced if missing. Check—and adjust if necessary—the rear-wheel braking system to ensure uniform action.
The electrical inspection follows. Starter motor and dynamo should be removed for cleaning and testing.
The fuel pump should be removed, phased and calibrated and the injectors cleaned and cracking pressures checked.
Reconditioned units
In nine cases out of 10, reconditioned units held in stock can be fitted to the vehicle to save both time and expense. Items removed should be overhauled and—if still usablb—kept ready in stock. Obviously, the governing factor is whether such items can be economically reconditioned compared with the price of their factory reconditioned (or new) equivalents.
But lack of spares or difficulty or delay in obtaining them is another important factor to consider. Reconditioning has certainly paid dividends in this respect in our case. We have even gone to the extent of recovering parts using microflow welding— on many occasions producing parts better than the originals.
From the workshop, the vehicle goes to the service bay for greasing and the usual topping-up. Next stop is the tyre shop for tyre matching or replacements.
Then the vehicle should undergo another thorough road test over the route taken previously. If it passes, it goes back into service, white its service record, brought fully up to date, goes back on file.
Trailers often neglected
Trailers often seem to be neglected in a large fleet. But this can easily be avoided by the use of a planned maintenance system.
If possible, a separate bay should be used for trailer inspection and repair. And this work should not merely be left to an apprentice.
Assuming a minimum of three trailers to every tractive unit in a fleet, it is not difficult to organize regular and efficient maintenance.
The fitter should look for wear or fractures on the fifth-wheel pin, the wearing plate and retaining bolts; and he must check the brake linkage and wear in the clevis pins or yokes. With air brakes, air lines must be checked for signs of wear or fractures. Brakeshoe linings also have to be inspected, using the same procedure as that for a rigid.
Wheel nuts are important and should be checked. A trailer may be used by three or more drivers a week—each taking it for granted that someone else has checked the nuts.
Also requiring careful scrutiny are lights and springing. Another important point is the rope hooks on the trailer sides. They should be secure and "all present and correct".
Complete the trailer inspection with a close look at tyres and pressures, a greasing throughout and a road test with tractive unit.
And, of course, every aspect of this trailer maintenance should be recorded on its maintenance chart.
Tractive units
Tractive units should undergo the same maintenance as platform vehicles. But extras to be checked are coupling gears and, if fitted, operation of the "dead man" or trailer brake.
Pay especial attention to a tractive unit's wheel nuts—worth checking daily if possible. For drivers sometimes have difficulty in picking up laden trailers, rear wheels may spin, the unit jerk—and those vital wheel nuts work loose under the strain.