Measurement: 1, Rules and calipers
Page 145

If you've noticed an error in this article please click here to report it so we can fix it.
SKILLED fitter must have the iility to measure accurately, id in the next few articles I all be looking at the various easuring devices which he is ely to need, Rules, calipers, icrbmeters, vernier, dial and e.I gauges are all to be found a vorkshop which carries out pes of repairs, and a fitter nnot really be classed as skil unless he is proficient in the e of all of them.
The degree of accuracy lich he must achieve when Dasuring depends, of course, I the character of the work on lich he is engaged. For ample, if holes have to be Wed in the hinge of a tailboard is probable that their location
II be quite satisfactory if their ntres are within 0.8mm ( in) that specified. On the other nd, if a cylinder is being rered or a crank journal meared for wear the dimensions II have to be accurate within 'elf a thou". The amount of -or permissible in a dimension known as the "tolerance' but s 4ubject, together with the rious "fits", will be dealt with a subsequent article.
The simplest of all measuring )Is is the humble steel rule iich, with careful use, can ve measurements with an :Limey of -± 0.4(m) (-± in). 3e11 rules are made in various igths with both metric and penal markings. A 150mm e (Gin) that is marked in both llimetres and inches is a connient pocket size; longer
igths are available for workDp use but lengths over about -netre are bettered measured th a steel tape.
To measure the diameter of a cular part it is necessary to addle across its greatest di
msion and a rule is not a con-dent tool for doing this, so for n41 work calipers are used.
e hape of calipers varies 3oiding to whether they are e ternal or internal use.
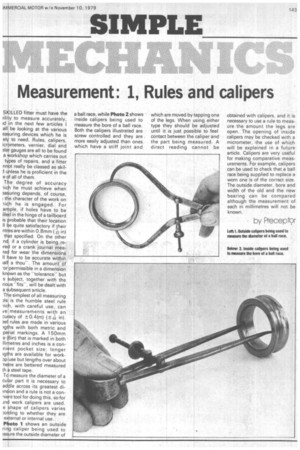
Photo 1 shows an outside ring caliper being used to !asure the outside diameter of a ball race, while Photo 2 shows inside calipers being used to measure the bore of a ball race. Both the calipers illustrated are screw controlled and they are more easily adjusted than ones which have a stiff joint and which are moved by tapping one of the legs. When using either type they should be adjusted until it is just possible to feel contact between the caliper and the part being measured. A direct reading cannot be obtained with calipers, and it is necessary to use a rule to measure the amount the legs are open. The opening of inside calipers may be checked with a micrometer, the use of which will be explained in a future article. Calipers are very useful for making comparative measurements. For example, calipers can be used to check that a ball race being supplied to replace a worn one is of the correct size. The outside diameter, bore and width of the old and the new bearing can be compared although the measurement of each in millimetres will not be known.
by Preceptor


