road and workshop
Page 44

Page 45

If you've noticed an error in this article please click here to report it so we can fix it.
by Handyman
Benchwise: coo/it (37)
AN INTERNAL LEAK may exist for quite some time before it is discovered or causes trouble. As a rule the leakage arises from head gasket trouble, although a warped or cracked head can leak inwardly. As gases leak past the head joint and into the coolant they dissolve into the coolant and form acids which cause rust and corrosion. If the gas leakage is severe it will force coolant out of the overflow pipe.
However, I want this week to deal a little more closely with the cumbustion gas leak into the cooling system, as this is very often accompanied by coolant leakage into the engine, and this has the effect — as described earlier in the series — of forming_ sludge and so interferring with lubrication. Serious leaks into the sump can build up the lowest oil level above the oil input pipe so that coolant and not oil is circulated, resulting in the bearings being starved and failing rapidly.
Therefore tests for combustion leakage should be made as soon as a coolant loss cannot be accounted for by the procedures already described, or if the coolant becomes unusually rusty in a short period of time.
Inward gas leak
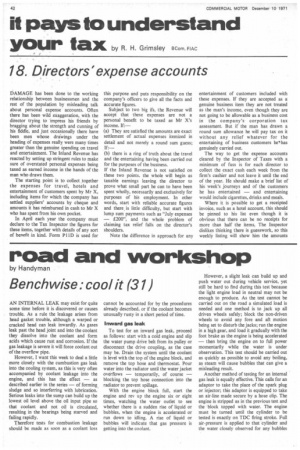
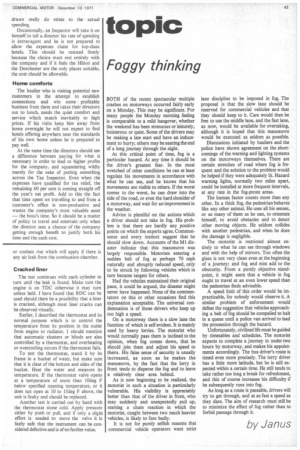
To test for an inward gas leak, proceed as follows: start with a cold engine and slip the water pump drive belt from its pulley or disconnect the drive coupling, as the case may be. Drain the system until the coolant is level with the top of the engine block, and remove the top hose and thermostat. Pour water into the radiator until the water jacket overflows — temporarily, of course — blocking the top hose connection into the radiator to prevent spillage.
With the engine block full, start the engine and rev up the engine six or eight times, watching the water outlet to see whether there is a sudden rise of liquid or bubbles, when the engine is accelerated or run down to idling. A rise of liquid or bubbles will indicate that gas pressure is getting into the coolant. However, a slight leak can build up and push water out during vehicle service, yet still be hard to find during this test because the light engine load in neutral may not be enough to produce. As the test cannot be carried out on the road a simulated load is needed and one method is to jack up all driven wheels safely; block the non-driven wheels to avoid any fore and aft motion being set to disturb the jacks; run the engine in a high gear, and load it gradually with the foot brake as the engine is being accelerated — then bring the engine on to full power momentarily while the water is under observation. This test should be carried out as quickly as possible to avoid any boiling, as steam will cause bubbles that can give a misleading result.
Another method of testing for an internal gas leak is equally effective. This calls for an adaptor to take the place of the spark plug or injector; this adaptor is equipped to take an air-line made secure by a hose clip. The engine is stripped as in the previous test and the block topped with water. The engine must be turned until the cylinder to be tested is exactly on TDC firing stroke. Full air-pressure is applied to that cylinder and the water closely observed for any bubbles or coolant rise which will apply if there is any air leak from the combustion chamber.
Cracked liner The test continues with each cylinder in turn until the leak is found. Make sure the engine is on TDC otherwise it may turn unless held. I have found that BDC can be used should there be a possibility that a liner is cracked, although most liner cracks can be observed visually.
Earlier, I described the thermostat and its normal purpose which is to control the temperature from its position in the outlet from engine to radiator. I should mention that automatic shutters or blinds are also controlled by a thermostat, and overheating or overcooling occurs if the thermostat fails.
To test the thermostat, stand it by its frame in a bucket of water, but make sure that it is clear of the bottom and sides of the bucket. Heat the water and measure its temperature. If the thermostat vabie opens at a temperature of more than 10deg F below specified opening temperature, or it does not open at 10 to 15deg F above, the unit is faulty and should be replaced.
Another test is carried out by hand with the thermostat stone cold. Apply pressure either by push or pull, and if only a slight effort is needed to move the valve it is fairly safe that the instrument can be considered defective and is of no further value.


