


WORKSHOP WAYS
Page 97
Page 98
Page 99
Page 100
If you've noticed an error in this article please click here to report it so we can fix it.
NEercedes-Benz stuck with 125kW (170hp) for its 17tonners for almost 15 years. But even the German giant cannot buck the trend to higher-powered vehicles indefinitely, and in mid-1990 it announced a 155kW (211hp) version to run alongside its lower-powered brother.
Providing the power is a 5.96-litre six-cylinder charge-cooled engine. As the vehicle has automatic brake slack adjusters and chassis lubrication, service intervals depend on the oil used in the engine and the type of operation.
When the vehicle is used in severe conditions a service is required at 10,0001tm. With short-distance stopstart work the service intervals are 30,000km, while on long distance work using the correct oil the intervals can be extended to 45,000km.
Mercedes-Benz is keen for operators to use higher quality oils as the service schedule is based on 45,000km intervals. If other oils are used then oil and filter-only services are required at the prescribed intervals. When extending the drain to 45,000km there is only one level of service.
The standard time (excluding inspection) for the Maintenance Service, as M-B calls it, is 4.1 hours, but extra checks every other service takes this to 5.7 hours.
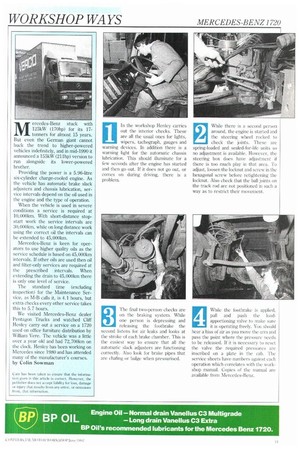
We visited Mercedes-Benz dealer Pentagon Trucks and watched Cliff Henley carry out a service on a 1720 used on office furniture distribution by William Vere. The vehicle was a little over a year old and had 72,700km on the clock. Henley has been working on Mercedes since 1980 and has attended many of the manufacturer's courses. by Colin Soveman In the workshop Henley carries out the interior checks. These are all the usual ones for lights, wipers, tachograph, gauges and warning devices. In addition there is a warning light for the automatic chassis lubrication. This should illuminate for a few seconds after the engine has started and then go out. If it does not go out, or comes on during driving, there is a problem.
1
While there is a second person around, the engine is started and the steering wheel rocked to check the joints. These are spring-loaded and sealed-for-life units so no adjustment is available. However, the steering box does have adjustment if there is too much play in that area. To adjust, loosen the locknut and screw in the hexagonal screw before retightening the locknut. Also check that the ball joints on the track rod are not positioned in such a way as to restrict their movement.
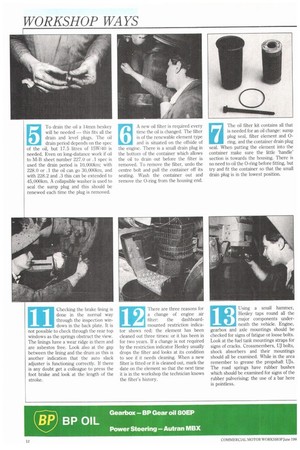
3 The final two-person checks are
on the braking system. While one person is depressing and releasing the footbrake the second listens for air leaks and looks at the stroke of each brake chamber. This is the easiest way to ensure that all the automatic slack adjusters are functioning correctly. Also look for brake pipes that are chafing or bulge when pressurised.
4 While the footbrake is applied,
pull and push the load apportioning valve to make sure it is operating freely. You should hear a hiss of air as you move the arm and pass the point where the pressure needs to be released. [fit is necessary to reset the valve the required pressures are inscribed on a plate in the cab. The service sheets have numbers against each operation which correlates with the workshop manual. Copies of the manual are available from Mercedes-Benz. To drain the oil a 14mm hexkey will be needed — this fits all the drain and level plugs. The oil drain period depends on the spec of the oil, but 17.5 litres of 15W/40 is needed. Even on long-distance work if oil to M-B sheet number 227.0 or .1 spec is used the drain period is 10,000km; with 228.0 or .1 the oil can go 30,000km, and with 228.2 and .3 this can be extended to 45,000km. A collapsible washer is used to seal the sump plug and this should be renewed each time the plug is removed. A new oil filter is required every time the oil is changed. The filter is of the renewable element type and is situated on the offside of the engine. There is a small drain plug in the bottom of the container which allows the oil to drain out before the filter is removed. To remove the filter, undo the centre bolt and pull the container off its seating. Wash the container out and remove the 0-ring from the housing end. The oil filter kit contains all that is needed for an oil change: sump plug seal, filter element and 0ring, and the container drain plug seal. When putting the element into the container make sure the little 'handle' section is towards the housing. There is no need to oil the 0-ring before fitting, but try and fit the container so that the small drain plug is in the lowest position. The 1720 is fitted with the Mercedes-Benz G4/65 gearbox. This is a six-speed unit which requires an oil change every 45,000km with level checks if the vehicle comes into the workshop between changes. Again a 14mm hexkey is needed to remove the drain and the level/filler plug. Henley advises that the level/filler plug should be removed before the drain. This is from experience of not being able to remove the filler plug as it has been rounded out. Refilling the box requires 13.2 litres of SAE8OW or 80W/85 oil to M-B sheet number 235.1. Remember to check that the breather on the top of the gearbox is not blocked. Oil changes in the rear axle are also at 45,000km intervals with level checks if the vehicle comes into the workshop between changes. Like the gearbox the plugs in the axle have tapered threads and so require no sealing devices. Our vehicle has the Mercedes-Benz H/L4 rear axle which requires 11 litres of oil. This should be either an SAE 90 or an 85W/90 to M-B sheet number 235. It is important to check the rear axle's breather on the early models as they have the mushroom type. Later models have a tube which is less likely to block.
10 At each service the sliding block in the rear axle should
be adjusted. This block pre
vents the crown wheel pushing away from the pinion. To adjust, undo the locknut on the nearside of the pinion housing, use a hexkey to screw the block in until it contacts the crown wheel. It should then be backed off 1/6 of a turn (one flat) and the locknut retightened.
11 Checking the brake lining is
done in the normal way through the inspection win dows in the back plate. It is not possible to check through the rear top windows as the springs obstruct the view. The linings have a wear ridge in them and are asbestos free. Look also at the gap between the lining and the drum as this is another indication that the auto slack adjuster is functioning correctly. If there is any doubt get a colleague to press the foot brake and look at the length of the stroke.
12 There are three reasons for
a change of engine air filter: the dashboard mounted restriction indicator shows red; the element has been cleaned out three times: or it has been in for two years. If a change is not required by the restriction indicator Henley usually drops the filter and looks at its condition to see if it needs cleaning. When a new filter is fitted or it is cleaned out, mark the date on the element so that the next time it is in the workshop the technician knows the filter's history.
13 Using a small hammer,
Henley taps round all the major components under neath the vehicle. Engine, gearbox and axle mountings should be checked for signs of fatigue or loose bolts. Look at the fuel tank mountings straps for signs of cracks. Crossmembers, UJ bolts, shock absorbers and their mountings should all be examined. While in the area remember to grease the propshaft Uls. The road springs have rubber bushes which should be examined for signs of the rubber pulverising; the use of a bar here is pointless.
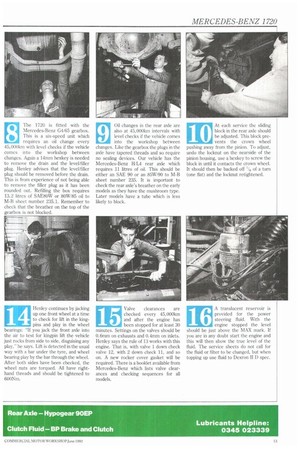
14 Henley continues by jacking
up one front wheel at a time to check for lift in the king pins and play in the wheel bearings: "If you jack the front axle into the air to test for kingpin lift the vehicle just rocks from side to side, disguising any play," he says. Lift is detected in the usual way with a bar under the tyre, and wheel bearing play by the bar through the wheel. After both sides have been checked, the wheel nuts are torqued. All have righthand threads and should be tightened to 600Nm. Valve clearances are checked every 45,000km and after the engine has been stopped for at least 30 minutes. Settings on the valves should be 0.6mm on exhausts and 0.4mm on inlets. Henley says the rule of 13 works with this engine. That is, with valve 1 down check valve 12, with 2 down check 11, and so on. A new rocker cover gasket will be required. There is a booklet available from Mercedes-Benz which lists valve clearances and checking sequences for all models.
16 A translucent reservoir is provided for the power
steering fluid. With the engine stopped the level should be just above the MAX mark. If you are in any doubt start the engine and this will then show the true level of the fluid. The service sheets do not call for the fluid or filter to be changed, but when topping up use fluid to Dexron II D spec.
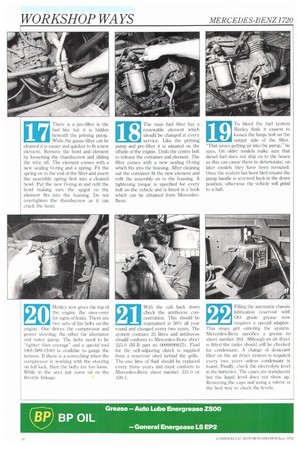
17 There is a pre-filter in the
fuel line but it is hidden beneath the priming pump.
While the gauze filter can be cleaned it is easier and quicker to fit a new element. Remove the bowl and element by loosening the thumbscrew and sliding the wire off. The element comes with a new sealing 0-ring and a spring. Fit the spring on to the end of the filter and insert the assembly spring first into a cleaned bowl. Put the new 0-ring in and refit the bowl making sure the spigot on the element fits into the housing. Do not overtighten the thumbscrew as it can crack the bowl.
18 The main fuel filter has a
renewable element which should be changed at every service. Like the priming pump and pre-filter it is situated on the offside of the engine. Undo the centre bolt to release the container and element. The filter comes with a new sealing 0-ring which fits into the housing. After cleaning out the container lit the new element and refit the assembly on to the housing. A tightening torque is specified for every bolt on the vehicle and is listed in a book which can be obtained from MercedesBenz.
19 To bleed the fuel system
Henley finds it easiest to loosen the banjo bolt on the output side of the filter. "That saves getting air into the pump," he says. On older models make sure that diesel fuel does not drip on to the hoses as this can cause them to deteriorate; on later models they have been rerouted. Once the system has been bled ensure the pump handle is screwed back in the down position, otherwise the vehicle will grind to a halt.
20 Henley now gives the top of
the engine the once-over for signs of leaks. There are two sets of fan belts on the engine. One drives the compressor and power steering; the other the alternator and water pump. The belts need to be "tighter than average" and a special tool (001-589-2100) is available to gauge the tension. If there is a screeching when the compressor is working with the steering on full lock, then the belts are too loose. While in the area put some oil on the throttle linkage.
21 With the cab back down
check the antifreeze con
centration. Tl-Us should be maintained at 50% all year round and changed every two years. The system contains 25 litres and antifreeze should conform to Mercedes-Benz sheet 325.0 (M-B part no 0009890825). Fluid for the self-adjusting clutch is supplied from a reservoir sited behind the grille. The one litre of fluid should be replaced every three years and roust conform to Mercedes-Benz sheet number :331.0 or 330.1.
Filling the automatic chassis lubrication reservoir with 00 grade grease now requires a special adaptor. This stops grit entering the system. Mercedes-Benz specifies a grease to sheet number 264. Although an air dryer is fitted the tanks should still be checked for condensate. A change of desiccant filter on the air dryer system is required every two years unless condensate is found. Finally, check the electrolyte level in the batteries. The cases are translucent but the liquid level does not show up. Removing the caps and using a mirror is the best way to check the levels.