


HINTS ON MAINTENANCE.
Page 62
If you've noticed an error in this article please click here to report it so we can fix it.
The Peerless Foot Brake, Engine Lubricating System on the Berliet, and Karrier Clutch.
Renovating the Foot Brake of a Peerless.
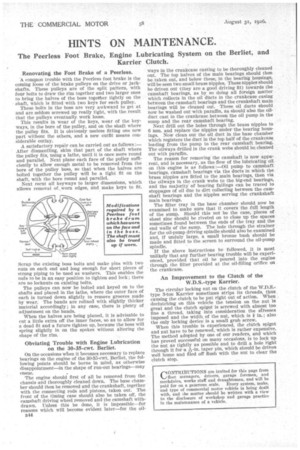
A common trouble with the Peerless foot brake is the coming loose of the brake pulleys on the drive or jackshafts. These pulleys are of the split pattern, with four bolts to draw the rim together and two larger ones to bring the halves of the boss together tightly on the shaft, which is fitted with two keys for each pulley.
These bolts in the boss are very awkward to get at and are seldom screwed up really tight, with the result that the pulleys eventually work loose.
This results in wear of the keys, wear of the keyways, in the bore of the pulley, and on the shaft where the pulley fits. It is obviously useless fitting one new part without the others, and a new outfit means considerable outlay.
A satisfactory repair can be carried out as follows :— After dismantling, skim that part of the shaft where the pulley fits, using a lathe, until it is once more round and parallel. Next plane each face of the pulley sufficiently to allow enough metal to be removed prom the bore of the pulley boss, so that when the halves are bolted together the pulley will be a tight fit on the shaft, with the bore round and parallel.
Next recut all keyways to larger dimensions, which allows removal of, worn edges, and make keys to fit.
Scrap the existing boss bolts and make pins with two nuts on each end and long enough for short pieces of strong piping to be used as washers. This enables the nuts to be in an easy position to tighten and lock ; there are no locknuts on existing bolts.
The pulleys can now be bolted and keyed on to the shafts and placed in the lathe, where the outer face of each is turned down slightly to remove grooves made by wear. The bands are relined with slightly thicker material accordingly ; in any case, there is plenty of adjustment on the bands.
When the halves are being planed, it is advisable to cut a little extra off the inner faces, so as to allow for a dead fit and a future tighten up, because the boss will spring slightly in on the spokes without altering the shape of the rim.
Obviating Trouble with Engine Lubrication on the 30-35-cwt. Berliet.
On the occasions when it becomes necessary to replace bearings on the engine of the 30-35-cwt. Bernet, the following points should be borne in mind, as otherwise disappointment—in the shape of run-out bearings—may ensue.
The engine should first of all be removed from the chassis and thoroughly cleaned down. The base chamber should then be removed and the crankshaft, together with the connecting rods and pistons, taken out. The front of the timing case should also be taken off, the camshaft driving wheel removed and the camshaft withdrawn. Unless this be done, it is impossible—for reasons which will become evident later—for the oil 1344 ways in the crankcase casting to be thoroughly cleaned out. The top halves of the main bearings should then be taken out, and below these, in the bearing housings, will be seen two small brass nipples. These nipples should be driven out (they are a good driving fit) towards the camshaft bearings, as by so doing all foreign matter which collects in the oil ducts in the crankcase casing between the camshaft bearings and the crankshaft main bearings will be cleaned out. These oil ducts should now be washed out with paraffin, as should also the oilduct cast in the crankcase between the oil pump in the sump and the rear camshaft bearing.
Next drill out the holes through the brass nipples to 6 mm. and replace the nipples under 'the bearing housings. Now clean out the oil duct in the base chamber which registers the duct in the top half of the crankcase leading from the pump to the rear camshaft bearing. The oilways drilled in the crank webs should be cleaned out with paraffin.
The reason for removing the camshaft is now apparent, and is necessary, as the flow of the lubricating oil on this engine is as follows :—Oil pump to camshaft bearings, camshaft bearings via the ducts in which the brass nipples are fitted to the main bearings, then via the oilways in the crank webs to tha big-end bearings, and the majority of bearing failings can be traced to stoppages of oil due to dirt collecting between the camshaft bearings and the nipples serving the crankshaft main bearings.
The filter tray in the base chamber should now be examined to make sure that it covers the full length of the sump. Should this not be the case, pieces of sheet zinc should be riveted on to close up the spaces sometimes found between the ends of the tray and the end walls of the sump. The hole through the strainer for the oil-pump driving spindle should also be examined and, if unduly large, a small bronze hush should be made and fitted to the screen to surround the oil-pump Spindle. If the above instructions be followed, it is most unlikely that any further bearing trouble will be experienced, provided that oil be poured into the engine through the filter provided at the oil-filling orifice on the crankcase.
An Improvement to the Clutch of the W.D.S.-type Karrier.
The circular locking nut on the clutch of the W.D.S.type 3-ton Karrier sometimes strips its threads, thus causing the clutch to be put right out of action. When declutching on this vehicle the tension on the nut is great and the clutch spigot is screwed with almost too fine a thread, taking into consideration the stresses imposed and the width, of the nut, which is in.; also the only locking device is a small grub screw.
When this trouble is experienced, the clutch spigot and nut have to be renewed, which is rather expensive. The method adopted by one of our readers, and which has proved successful on many occasions, is to lock up the nut as tightly as possible and to drill a hole right through it for a -,1 -in. taper pin, which should be driven well home and filed off flush with the nut to clear the clutch stop.