Play the economy tune
Page 67

If you've noticed an error in this article please click here to report it so we can fix it.
WITH a few basic tools and a lead and 12V bulb assembly any operator can make a reasonable attempt at timing a petrol engine. The result will not he as good as timing with electronic equipment, but performance and consumption losses can still be kept well down.
Before tuning, check engine condition; if it does not come up to scratch there is no point in trying to tune it.
Adjust tappet clearance to the manufacturer's recommended figure; check the individual cylinder pressures—a gauge for this can be bought from your local tools stockist.
In order to check cylinder pressures remove the sparking plugs and either fit or hold the gauge (depending on type) in the vacant plug-hole of each cylinder; turn the engine on the starter motor with the throttle open to get a reading, and when shifting the gauge on to the next cylinder do not forget to re-zero it or you will get a false reading.
Cylinder pressures should be within 68.95kN/sqm (10psi) of each other, and ideally not more than that below the manufacturer's figure.
Useful guide
Inspecting the business end of the used spark plugs also provides a useful guide to engine tune and condition, and can save large repair bills later.
Every plug end tells a story though there are about a dozen plug-end conditions which can arise; probably the most common are carbonfouled ends indicating rich mixture, weak ignition, retarded timing or low compression; oil-fouled ends indicating badly worn cylinder bores and piston rings or valve guides; chalk white insulator colours and excessive gap erosion which point to hotter than normal operating temperatures caused by over advanced timing, weak mixture and poor inlet manifold sealing or distributor cam wear. Recommended plug life is 16,000km (10,000 miles) with a service at the half-way stage, so replace or clean as necessary.
Check the points for pitting and piling and if there is evidence of it replace them. And be sure to re-assemble the new points correctly. The points must open and shut cleanly or the rapid collapse of the magnetic field in the primary coil will not occur, and a poor spark will be obtained.
Turnover
If the insulated washer and bush are wrongly assembled the points short to earth and will not function at all. Clean new points with a solvent to remove any inhibitor that may have been applied to the working faces.
Adjusting the points gap with a feeler gauge is not a very accurate method so ensure that the points are open to their fullest extent, the follower being at the highest part of the cam. Insert the gauge as true as you can and recheck the setting by turning the engine over and resiting the follower on the cam.
With electronic equipment the dwell angle (the amount of time the points remain closed) is the measurement used to set the points gap and apart from being easier the resulting setting is more accurate.
The gap between the segments and distributor rotor is critical for optimum performance, and so if there is a carbon build-up on either it is best to replace them rather than scrape the excess and some brass off.
Timing marks
Once the points have been set the engine timing must be corrected and it is here that the first problem will arise if no specialist equipment is available. Many manufacturers quote a basic timing with the engine running and the vacuum advance disconnected. Accurate setting is almost impossible unless a stroboscope is used and timing marks clearly marked on the crankshaft pulley or the flywheel.
Try to get a static timing recommendation from the manufacturer or failing that invest in a stroboscope and some form of rev counter, If you are going to buy a strobe remember that some do not throw a sufficiently strong light that can pick up timing marks unless the vehicle is well shaded from normal daylight.
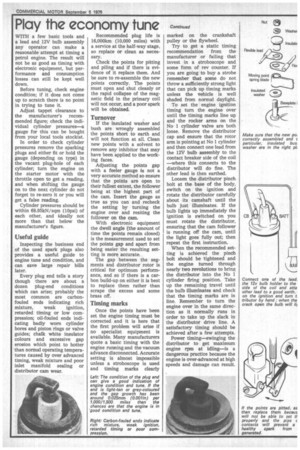
To set the engine ignition timing turn the engine over until the timing marks line up and the rocker arms on the No 1 cylinder valve are both loose. Remove the distributor cap and ensure that the rotor arm is pointing at No 1 cylinder and then connect one lead from the 12V bulb assembly to the contact breaker side of the coil —where this connects to the distributor will do fine. The other lead is then earthed.
Loosen the distributor pinch bolt at the base of the body, switch on the ignition and rotate the distributor carefully about its camshaft until the bulb just illuminates. If the bulb lights up immediately the ignition is switched on you must rotate the distributor, ensuring that the cam follower is running off the cam, until the light goes fully out; then repeat the first instruction.
When the recommended setting is achieved the pinch bolt should be tightened and the engine turned through nearly two revolutions to bring the distributor into the No 1 cylinder firing position. Take up the remaining travel until the bulb illuminates and check that the timing marks are in line. Remember to turn the engine over in the same direction as it normally runs in order to take up the slack in the distributor drive line. A satisfactory timing should be achieved after a few attempts.
Power timing—swinging the distributor to get maximum engine rpm at idling—is a dangerous practice because the engine is over-advanced at high speeds and damage can result.


